Your Husqvarna won’t start most often because the fuel mix, primer bulb, carburetor, compression, or airflow is off. First, make sure you’re using a fresh 50:1 two‑cycle mix (2.6 oz oil per gallon) and shake it well. Then check the primer bulb—remove it, spray carb cleaner into the return port, and press it repeatedly until fuel flows smoothly. Clean the carburetor, blow out any debris, and set the L‑screw a quarter turn richer. Test compression with a gauge; over 120 PSI is solid. Finally, clear the spark arrestor, muffler, and air filter, and verify the choke is wide open. The good news is fixing any one of these usually gets the engine humming again, and the next steps will show you how to fine‑tune everything.
Check and Correct the Two‑Cycle Fuel Mix Before Refueling
If you’ve ever tried to fire up a Husqvarna leaf blower and heard that dreaded sputter, the culprit is often the fuel mix. You need a proper fuel ratio—usually 50:1, which means 2.6 oz of 2‑stroke oil per gallon of high‑octane, ethanol‑free gasoline. Mix in a clean, airtight container, not the tank, shaking after each addition to keep oil suspended. Fill the tank only to about 80 % and agitate before each refill. The good news is a fresh batch lasts roughly a month; beyond that the storage lifespan drops and deposits form. What most people don’t realize is that even a slight deviation—too much oil or too little—can cause hard starts, smoke, or internal wear. Keep the mix tight, use Husqvarna‑approved oil, and you’ll protect engine life while staying ready for the next yard‑work session. Never refuel while the engine is running or hot. For larger properties, a backpack blower can reduce fatigue during extended use. Follow the step‑by‑step checklist in the Stihl BG 86 guide to verify that your ignition switch and throttle are correctly positioned before pulling the starter cord. Choosing the right horsepower ensures the blower can handle dense leaf piles efficiently.

Genuine Husqvarna replacement part.

2 CYCLE ENGINE OIL: This 16 oz. two cycle oil mix bottle is your go-to solution for maintaining peak performance in two-cycle engines ensuring reliable lubrication and protection against wear and tear

PROTECTS AGAINST ENGINE RUST: Designed to increase reliability and longevity of engines. Special additives reduce corrosion and rust. Help keep equipment running better and longer
Diagnose and Fix a Stuck Primer Bulb (Two‑Cycle Engine)
When the primer bulb on your Husqvarna leaf blower refuses to fill, the engine won’t get the fuel it needs to fire up, and you’ll be stuck with a silent, useless tool. First, check the fuel line troubleshooting: make sure the short line is seated on the bottom nipple and the long line on the top, with the tank intake fully submerged. If the lines are reversed or loose, air leaks will prevent bulb sealing. Next, remove the bulb assembly and inspect for cracks or debris. Spray carburetor cleaner into the return‑to‑tank port and use compressed air to clear any blockage. Re‑install, press the bulb repeatedly, and watch for smooth fuel flow. If it still won’t fill, replace the bulb. Ensure the engine is cooled before starting the procedure. Modern leaf blowers like the Husqvarna model benefit from efficient airflow design that maximizes debris removal while minimizing fuel consumption. Stihl and Echo also offer comparable durability and noise‑reduction features that can influence your choice.
How to Clean a Clogged Carburetor (Two‑Cycle Engine)
Why does your Husqvarna leaf blower sputter and refuse to start? First, do a carburetor inspection. Remove the bottom plate with a screwdriver, then carefully separate the diaphragm and gasket. Pull off the needle valve mechanism, lever spring, and primer bulb, and unscrew the primer base to expose the reed valve. Use needle‑nose pliers for fuel line cleaning and detach the line. Spray carburetor cleaner on the body and into the fuel pathways, pointing away from the engine. Blow out residue with compressed air, then dry everything on a clean towel. Reassemble by reinstalling the diaphragm cover, needle valve, primer base, and reed valve, then reconnect the fuel line and throttle linkage. The good news is a clean carburetor usually revives a stubborn starter. Observe back pressure when the primer bulb is pressed to confirm the clog. Always wear protective gloves and eye protection while handling carburetor solvent to avoid skin irritation. A hydraulic ram pump can generate pulsating water pressure to power small tools in off‑grid settings. Check the ignition switch to ensure the safety interlock is not preventing the engine from starting.
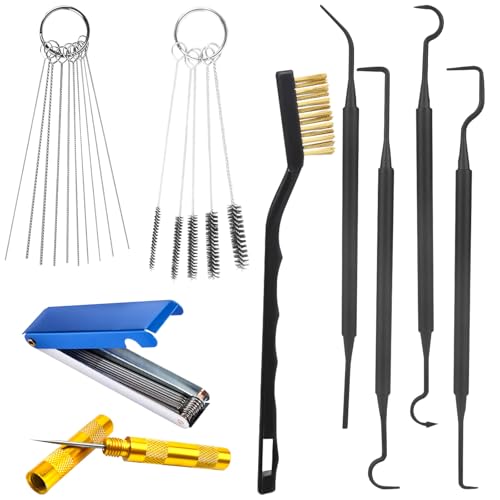
【Material】Engineered for performance and longevity, our carburetor cleaning kit utilizes high-grade stainless steel and tough nylon. The stainless steel components offer reliable strength and are designed to maintain their integrity, while the nylon brushes effectively scrub sensitive parts without causing damage. This thoughtful material selection provides a consistent and dependable cleaning experience through repeated use on various projects.
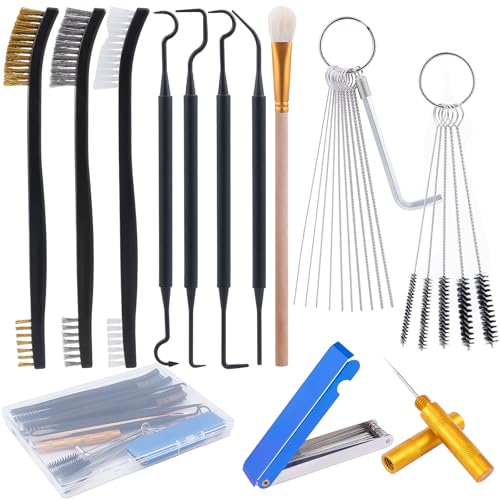
Complete 33-Piece Carb Cleaning Kit – Includes 13 stainless steel cleaning wires, 5 nylon brushes, 10 cleaning needles, 1 throttle wrench, 1 pointed tweezers, 3 double-ended brushes, and 4 hooks. Everything you need as a carb cleaning tool set in one box

Fast-acting immersion cleaner
Test Engine Compression and Rope‑Pull Resistance (Two‑Cycle Engine)
After you’ve cleared out the carburetor, the next thing to check is whether the engine actually builds pressure when you pull the rope. First, remove the spark plug and clean it, then hand‑tighten a good‑quality compression gauge into the plug hole. Add a few drops of two‑cycle oil into the chamber, set the throttle wide open, and make sure the engine’s warm. Now do a rope‑pull test: pull the starter rope several times, letting the gauge needle climb, then crank until it stabilizes. Do four or five full pulls for a reliable reading, release the pressure valve, and note the PSI. Over **120 PSI is solid; 90‑120 PSI is marginal; below 90 PSI means you’ve got low compression. Thumb the plug hole to feel resistance—strong resistance matches a good gauge reading, while a weak pull hints at worn rings or piston problems. If the reading jumps after adding oil, the rings are likely worn. Check the rubber O‑ring on the tester for good condition before installation. Also verify that the sparkplug‑fuel mixture is correct before starting fuel‑oil ratio for optimal combustion. Properly securing the air filter ensures consistent airflow during testing. Cold‑start procedure** can further improve reliability on a cold morning.

Professional Tester Kit: Our engine cylinder compression tester kit helps you measure pressure on gasoline engine cylinder quickly and accurately. Made of choice materials and treated with rust prevention and corrosion prevention, sturty and time-proof

【Deluxe Design Set】: Complete package for compression testing on gasoline engines, comes with 4 adapters of standard and specialty, and 16-inch flex hose gauge assembly with quick coupler, all firmly stored in the deluxe case.
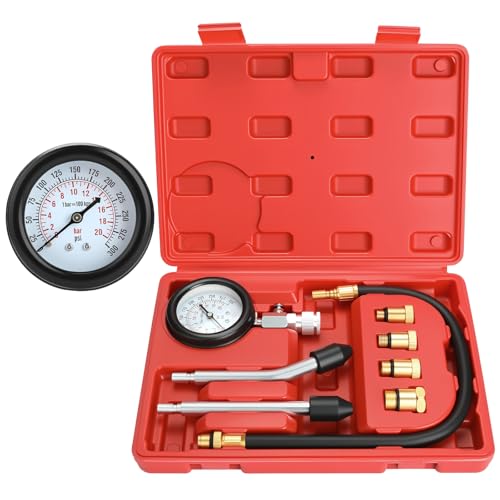
Checking Compression On Petrol Engine Quickly And Accurately
Clean Spark Arrestor, Muffler, and Air Filter (Two‑Cycle Engine)
If you’ve already cleared the carburetor and checked compression, the next thing to tackle is the spark arrestor, muffler, and air filter—those often‑overlooked parts that can choke your two‑cycle leaf blower. First, locate the spark arrestor on the muffler; you’ll usually need to remove two screws on the cover. Pull the cover off and inspect the screen for rips, holes, or heavy carbon buildup. Use a wire brush or a quick torch pass to clear the carbon, then reinstall the arrestor and tighten the screws. A clean spark arrestor prevents fire hazards and engine shutdown. Next, check the muffler itself for clogs; a clean muffler restores proper exhaust flow. Finally, remove the air filter, tap out loose debris, wash it with mild soap, and let it dry before reinstalling or replacing it. Keeping these three components clean keeps your blower breathing easy and starting reliably. Using the correct fluid type ensures optimal lubrication and prevents seal damage. Professional airflow can make a noticeable difference in performance for heavy‑duty tasks. Proper blade angle adjustment is crucial for maintaining efficient cutting performance.
Re‑assemble, Tighten Bolts, Verify Startup, and Troubleshoot Remaining Issues (Two‑Cycle Engine)
You’ve just cleared the spark arrestor, muffler, and air filter, so the engine can breathe—now it’s time to put everything back together and make sure the blower actually starts. Re‑attach the air filter base with an 8 mm nut driver, aligning the choke lever to the wide position. Reconnect the fuel lines, making sure the filter line sits flat at the tank bottom and attaches to the carburetor nipple near the choke. Tighten the two nuts on the air filter base and the carburetor, then double‑check all fuel line fittings for proper orientation. Pull the rope slowly for a compression test, verify spark with a fresh plug, and watch for flooding. If it still won’t fire, run a carburetor cleaning, adjust the L‑screw a quarter‑turn, and revisit air filter troubleshooting for any missed debris. Compression loss can prevent the engine from starting even when spark and fuel are present. Regularly inspect hydraulic fluid for corrosive properties to avoid metal degradation that could affect engine components. Properly securing the air filter base also helps maintain the correct air‑fuel mixture for optimal performance.