To start your BG-86, position the throttle downward, prime the fuel system with 3–5 bulb pumps, and engage the choke fully to the “g” symbol for cold starts. Pull the starter rope with firm, brisk strokes—not one aggressive yank. Once it fires, let it idle for a few seconds, then shift the lever to “F” run mode as the engine warms. If it stalls, move the choke to the middle position. For warm starts, skip the primer and keep the choke in run position, pulling the rope once.
Prepare Your Leaf Blower for Starting
Before you pull that starter cord, you’ve got to get your Stihl BG-86 properly prepped—and honestly, this is where most people rush through and end up frustrated. Start by positioning the throttle lock downward; this is non‑negotiable for proper choke engagement. Next, check your fuel filter and make sure it’s clean, then prime the fuel system until you see fuel visible in the plastic bubble. This confirms adequate fuel delivery to your carburetor. While you’re at it, inspect your spark plug for any buildup or damage. Finally, secure the blower firmly to the ground—you’ll need solid footing when pulling that starter cord. Place foot on blower to keep it grounded and prevent unwanted movement during the starting process. These preparation steps take five minutes and save you thirty minutes of aggravation later. For large properties, a backpack blower can dramatically reduce fatigue compared to handheld models. Remember to verify the fuel‑oil mixture ratio before priming to avoid engine performance issues. Understanding the engine break‑in process helps ensure long‑term reliability.

For Stihl BG56C Air Filter, BG56C Tune Up Kit Fits stihl BG56 BG56C BG56CED BG56CEZ BG56Z BG56D BG66 BG66C BG66CED BG66CEZ BG66Z BG66D leaf blowers
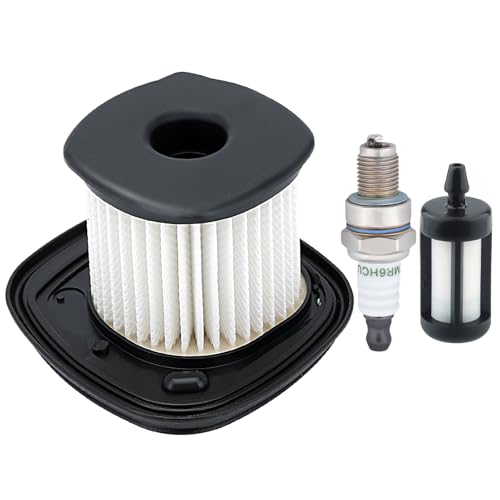
FITS FOR S-TIHL BG86 AIR FILTER, Air Filter Replace for 4241-140-4400 ,4241-140-4403.

Fuel Line Hose replaces #: 4241 358 7700
Prime the Fuel System in 3–5 Pumps
The primer bulb—that little plastic bubble you’ll find on the side of your BG-86—is your ticket to getting fuel where it needs to go before you even touch that starter cord. Here’s the thing: you’ll want to press it about three to five times to move fuel from the tank into the carburetor. Each squeeze forces fuel through the fuel valve and builds pressure, pushing out any air trapped in the lines. You’ll notice the bulb getting firmer as you pump—that’s your pressure gauge telling you it’s working. Don’t worry about over-pumping; the good news is you can’t damage anything by being thorough. Once that bulb feels resistant and stays full, you’re ready to move on to adjusting the choke and firing up your blower. Make sure the choke is fully engaged during the priming process to ensure proper fuel flow into the carburetor. Also, verify that the battery is fully charged before attempting to start, as a weak battery can prevent the ignition system from functioning correctly. Always check the fuel‑oil mixture ratio before priming to avoid engine damage. A clogged air filter can also cause the engine to stall after priming, so inspect and clean it regularly.


For S-tihl BG55 Tune Up Kit, Perfect Fit: The S-tihl BG55 air filter is designed to replace part numbers # 42291201800, 4229 120 1800 7, and 4229 120 1800C, ensuring a perfect fit.

Set the Choke for a Cold Start
Once you’ve primed that fuel system, the choke becomes your next critical move—and here’s the thing: getting it right on a cold start is what separates a smooth firing engine from one that floods and fights you.
Locate your choke knob and turn it fully to the g symbol. This position enriches your fuel-air mixture with the calibration you need for cold-start ignition. Don’t settle for halfway—alignment matters here. The g marking tells you you’re applying maximum enrichment for proper fuel-mix calibration.
Before engaging the choke, move your setting lever to the F run position. This step prevents throttle interference and locks everything in place. Incorrect choke setting can prevent engine start, so verify your position matches the manufacturer specifications before proceeding.
If choke-position troubleshooting becomes necessary later, remember: stalling means resetting to < and cranking again.
proper fuel mixing is essential for optimal engine performance and longevity.
Choosing the right leaf blower power can dramatically reduce fuel consumption and emissions.

Replacement part number: 4180 180 9500
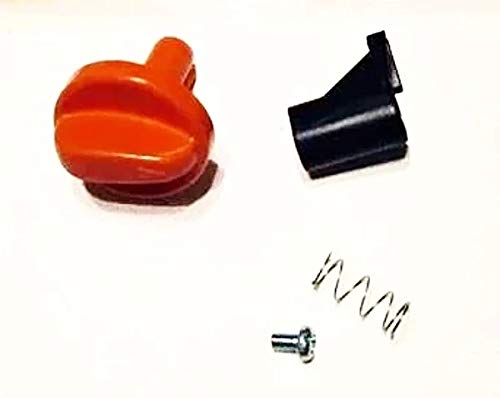
Genuine STIHL Replacement Part

Fitment: For Stihl BR500 BR550 BR600 BR700 Blower Zama C1Q-S183 Carburetor Carb
Pull the Starter Rope With Firm, Brisk Strokes
How’s your starter rope looking? Before you yank away, make sure you’ve got proper rope tension—this directly affects how smoothly your BG-86 fires up. Apply firm, brisk strokes rather than one aggressive pull. You’ll want steady, controlled tugs that let the engine catch without fighting back.
Here’s the thing: if your rope suddenly locks up mid-pull, don’t force it. Nine times out of ten, loose bolts on the flywheel cover are the culprit. Pop off that polymer cover with a screwdriver and tighten those three bolts—bolt maintenance prevents most starter headaches. Once you’ve confirmed everything’s tight, your pulls should feel smooth and responsive. Execute short, sharp tugs until the engine engages. That consistent, methodical approach beats brute force every time. For best results, ensure your rope ends are burned to prevent fraying during operation. Also, verify fuel mixture ratio before starting to avoid engine sputtering. Remember to perform a quick air filter inspection before each use to maintain optimal airflow and engine performance. Check the spark plug condition regularly to prevent ignition failures.

Genuine STIHL OEM Factory Part


Replaces OEM Part Number: 4137 190 4000
Warm Up and Stabilize the Engine
Before you get that engine running smoothly, you’ve got to prime the fuel system and set up your choke correctly—and here’s where most folks stumble. Once that engine fires up, it needs a moment to settle. Let it idle for a few seconds while you maintain engine control by pulling the trigger a couple times. This stabilizes combustion and guarantees fuel’s flowing properly through your fuel filter to the carburetor.
Don’t rush this phase. You’ll notice the choke automatically clicks left to the run position once things warm up. When your engine’s idling flat and smooth, you’re golden. That brief warm-up period is vital—it preps everything for accurate tuning adjustments down the road. For best results, verify idle after the engine reaches steady temperature before making any carburetor modifications. Patience here pays dividends in performance. Higher airflow volume (CFM) directly influences how quickly debris is cleared, making proper warm‑up essential for optimal airflow.

FITS FOR S-TIHL BG86 CARBURETOR, Carburetor Replace for 4241-120-0623, 4241-120-0616; Zama C1M-S261B C1M-S261C.

Air filter for STIHL BG86 BG86C SH86 SH86C blower; please note: some bg86 blower needs a pad type air filter, please check your original one before buying. Tune up kit for Stihl bg86 bg86c leaf blower primer bulb spark plug fuel filter parts

Designed as a direct replacement for part number #: 4241 120 1800, this kit fits for STIHL handheld, vacuum, and backpack blowers
Shift to Run Mode and Fine-Tune Idle
Now that your engine’s warmed up and running, it’s time to shift everything into run mode—and this is where things get really straightforward. Move your setting lever to position F, which locks your throttle trigger in the proper operating position. You’ll notice the lever springs back automatically once you stop, so you don’t need to worry about resetting it manually.
Next, fine-tune your idle speed using the idle screw on the carburetor. If your engine’s struggling to maintain a steady idle, grab a Phillips head screwdriver and turn the idle screw clockwise until your blower settles into smooth, consistent running. The idle screw sits right next to the run position dial—easy to spot. Your BG 86‘s now ready for serious work. Clean the carburetor before reassembly to ensure optimal performance. The lighter design of Echo blowers often makes residential tasks easier, a factor to consider when choosing a tool for home use. Remember to check the fuel level regularly to avoid interruptions during operation.
Recover From a Stall: Return Choke to Middle
Your BG-86 just died on you mid-job—frustrating, right? Don’t worry; this happens more often than you’d think, and the fix is simple. When your blower stalls unexpectedly, your first move is a choke adjustment for proper stall recovery. Locate the choke lever on your BG-86 and move it to the middle position. Here’s the thing: the middle setting gives your engine the balanced fuel-air mixture it needs to restart without flooding or running too lean. If your blower continues to have starting issues after choke adjustment, a clogged carburetor may be the underlying cause requiring deeper cleaning. Once you’ve made this choke adjustment, try starting the blower again using normal starting procedures. The good news is that returning to the middle position usually gets you back in action quickly. This straightforward technique prevents common restart issues and keeps your workflow moving. The original leaf blower was invented by Walter B. H. Smith in the 1950s, marking a pivotal moment in garden tool technology. Using a hydraulic pressure system can greatly improve the efficiency of splitting logs for firewood.
Starting a Warm Leaf Blower: Skip Prime and Choke
Once your BG‑86’s engine is still warm from recent use, you can throw away half the starting ritual you’d normally follow. Here’s the thing—residual heat does the heavy lifting for you. Skip the primer bulb entirely; there’s no need to press it when warmth’s already in the engine. Leave your choke in the run position, not the cold start position. This simplified approach reduces complexity and gets you blowing again faster.
Fuel safety remains paramount even during warm starts, so verify your ignition switch is in the run position before pulling the starter rope. You’ll likely fire up on a single pull. If you’re running regular maintenance schedule checks, you’ll notice warm restarts reward you with incredible reliability. Just grip firmly, pull decisively, and guide that rope back smoothly—no snapping—to prevent hand injuries from the starter cord wrapping around your fingers. Remember to keep bystanders and pets at least 50 feet away during operation. Warm starts also contribute to time‑saving efficiency by cutting down on the number of pull cycles needed.