Grab a few 2×2s, cut them into 4‑ft sections, and build a square frame on a sturdy 3/4‑inch plywood base; screw the back edge to the base, add a 5‑ft prop for rear lift, and bolt a 2×2 through‑angle to a trailer hitch. Mount a high‑CFM blower on a swing‑around mount, connect a 5‑inch insulated hose, and run a short 4‑inch vent pipe straight out. Stretch deer netting over the frame, add a zip‑tied flap gate and a weather‑proof hatch, then secure the whole rig to a trailer with a swing‑arm bracket for 270° pivot. The good news is you’ll have a low‑profile, trailer‑mounted leaf vacuum that handles tight corners, and the next steps will show you how to fine‑tune airflow and troubleshoot common issues.
How to Build a Simple Leaf‑Vacuum Frame From 2×2 Lumber
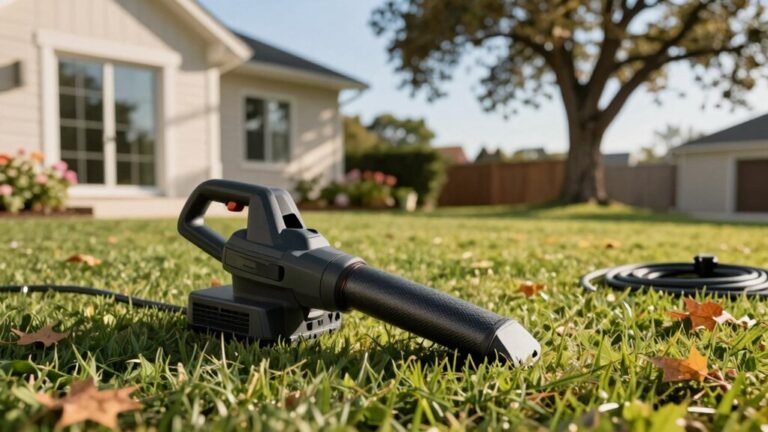
If you’ve ever tried to yank a leaf‑vacuum hose off a mower and ended up with a tangled mess, you know why a sturdy frame matters—so let’s get that 2×2‑lumber skeleton up and running. Start by cutting ten 8‑foot 2×2s into four‑foot sections; these form the square box that sits on your plywood base. Screw the back edge of each 2×2 to the base, then add a 5‑foot prop to lift the rear. Use scrap 1×2s for auxiliary braces and bolt a 2×2 pine through angle iron to the trailer hitch for extra rigidity. Install a main crossmember halfway up each side; this is where material design meets hose routing, keeping the hose snug against brackets. Finish with a top 2×12 board across the front for reinforcement, and tighten everything with lag screws and bungee cords for lasting stability. Add a diagonal triangle brace across the frame for added rigidity. For large properties, a backpack blower can dramatically reduce fatigue during extended use. Always check the fuel‑oil mixture before starting to prevent engine damage.
Pick the Best Plywood Base & Vent Pipe for Strong Leaf‑Vacuum Airflow
So, which plywood should you pick for a base that won’t wobble under a leaf‑vacuum’s suction? The good news is a 3/4″ sheet gives you rock‑solid stiffness, but if you’re watching the budget, a 5/8″ G1S board works just as well and saves a few bucks. Make sure the board is flat—any warp will sap airflow. Lightly sand the surface, then coat it with a sealant like DryLoc to keep moisture out. For the vent, aim for a pipe with a diameter that matches your blower’s output; a 4‑inch Vent pipe diameter is a sweet spot for high‑volume, low‑pressure flow. Keep the pipe as short and straight as possible, and you’ll get strong, consistent suction without choking the system. Modern leaf blowers achieve remarkable efficiency thanks to advanced aerodynamic design that maximizes airflow while minimizing energy consumption. Higher CFM ratings indicate greater airflow power, helping the vacuum clear debris more effectively. Choosing a blower with a higher horsepower rating can further improve suction performance on larger yards.

STRONG, DURABLE, HEAVY-DUTY - These craft wood pieces of multi-coated Baltic Birch plywood offer exceptional durability, rigidity, and stability for all your woodworking needs. The surfaces provide excellent holding power for glue and screws and the birch edges create cleaner joinery.

STRONG, DURABLE, HEAVY-DUTY - These craft wood pieces of multi-coated Baltic Birch plywood offer exceptional durability, rigidity, and stability for all your woodworking needs. The surfaces provide excellent holding power for glue and screws and the birch edges create cleaner joinery.

Premium Quality Baltic Birch Plywood: Made from high-quality B/BB grade Baltic Birch, offering superior strength, durability, and a smooth surface for all your crafting needs.
Install Deer Netting & Easy‑Access Door for Leaf‑Vacuum Cleaning
After you’ve nailed down a solid plywood base and the right vent pipe, the next step is to keep the whole setup protected from curious deer while still letting you get in and out for cleaning. First, stretch a sturdy 8‑foot‑high deer netting over the enclosure, anchoring it with ground stakes and zip ties at the corners. Cut a rectangular opening where you’ll install a gate doorting—think of it as a reinforced flap that swings shut when you’re not working. Attach hinges and a simple latch, then reinforce the frame with a few extra wire ties. Finally, cut a small access hatch in the netting near the base; use a weather‑proof cover that you can lift for quick leaf‑vacuum maintenance without disturbing the rest of the barrier. Stake the netting firmly to prevent deer from slipping underneath. Choosing the right airflow rating for your leaf‑vacuum can significantly improve debris removal efficiency. Higher airflow in professional models often translates to faster clearing of large debris piles. Using the proper seal‑protectant additive helps maintain the integrity of the netting’s attachment points.
Mount the Squirrel‑Cage Blower and Connect the Dust Hose
A sturdy steel plate sits on the trailer deck, ready to become the home for your squirrel‑cage blower, and the good news is that getting it mounted is quicker than you might think. First, line up the pre‑drilled 1/4‑inch holes and bolt the blower’s aluminum hub to the plate, using the three 2‑inch bolts that came with the impeller. Tighten until the shaft sits centered, then attach the swing‑around mount for that 270‑degree swing you’ll love. Next, fit the HVAC‑style duct adapter to the blower outlet; check nozzle sizing so the 5‑inch hose mates snugly. Slip the hose onto the adapter, then add a thin layer of hose insulation to keep condensate from freezing in cold weather. Secure with clamps, and you’re ready for leaf‑sucking action. The industrial‑grade squirrel cage provides the necessary durability for sustained high‑speed operation. Using a leaf blower’s high‑velocity air can also remove water droplets quickly, which is why it’s sometimes used for drying cars. Remember to prime the hydraulic pump before first use to prevent air lock and ensure consistent pressure. Always check hydraulic fluid before starting to avoid damage to the system.

Compatible With Major Brands | Comes in Supplying Demand packaging

7 Amp motor provides a powerful and efficient blowing performance

Safe & Easy Gutter Cleaning: Use the gutter blower attachment can avoid the dangers of ladder work, designed to clear debris from the safety of the ground, making maintenance simple and stress-free
Add a Trailer Arm for Mower‑Towed Leaf‑Vacuum Mobility
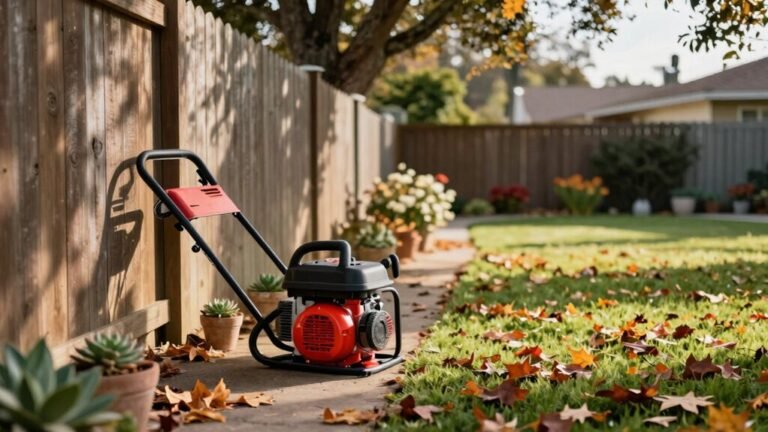
Ever wondered how to turn your zero‑turn mower into a leaf‑sucking powerhouse without sacrificing maneuverability? Adding a wing trailer with swing‑arm mounting gives you mower‑towed mobility and seamless leaf‑collector integration. First, pick a trailer that matches your mower’s hitch capacity—DR Leaf or Trac‑Vac models work well. Install the swing‑arm bracket on the trailer’s side, then attach the leaf‑vacuum housing so it pivots 270° for easy storage. Use the trailer jack stand to raise the tongue, line it up with your mower’s hitch, and lock it in place. Connect the suction hose; the arm keeps the collector level while you drive, so you can collect leaves around shrubs without stopping. The good news is the setup stays stable and low‑profile, letting you maneuver tight corners effortlessly. The SE models feature a clamshell design that allows quick, effortless unloading.

LARGE HIGH-CAPACITY COLLECTION SYSTEM: 26 bushel and 32 cu ft capacity holds more debris for fewer unloading stops during medium and large cleanup projects

LARGE HIGH-CAPACITY COLLECTION SYSTEM: 29 cu ft and 220 gallon collection capacity holds more debris for fewer unloading stops during larger cleanup projects
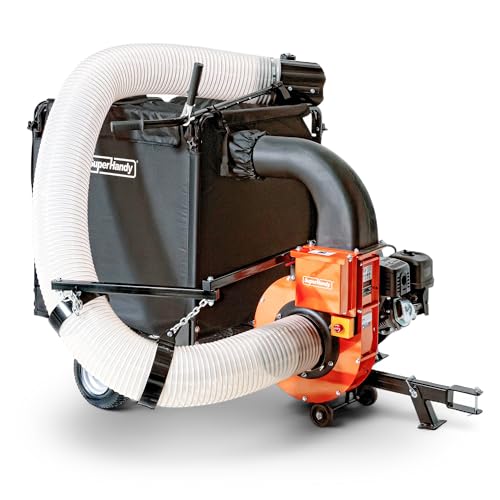
High-Capacity Collection – 180-gallon bag holds large volumes of leaves and clippings for fewer stops and faster yard cleanup
Troubleshoot Airflow Problems & Upgrade Your Leaf‑Vacuum
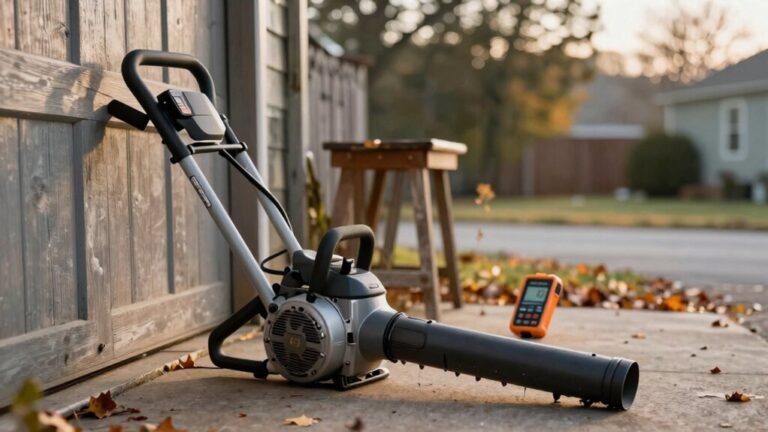
If your leaf‑vacuum is sputtering, losing suction, or stalling mid‑cut, the culprit is almost always an airflow issue, and the good news is you can fix most of them yourself with a few basic tools. First, pull the air filter and give it a good shake; a dirty filter will choke the carburetor. Next, open the muffler and perform spark arrestor cleaning—remove the screen, tap out soot, and replace if it’s corroded. Check the fuel line and do a fuel filter replacement; old gasoline can gum up the pump. Finally, do an impeller inspection: remove the housing, clear any debris, and verify the blades spin freely. These steps restore suction and keep your vacuum humming. Clean the carburetor using a proper solvent and a soft brush to clear any clogs. A clogged carburetor can also cause the engine to stall when you give it gas. Also, verify that the ignition switch is functioning properly to prevent startup failure.
【Replacement Part Number】This aftermarket part is used to replace the air filter 5687301 560873001 901590001. It is used on Trimmer, Leaf Blower / Vacuum, Chainsaw, Tiller.

Washable filter helps reduce household allergens such as tree, grass, and ragweed pollens.

【PERFECT FIT】: ✅This HP152 replacement filter is compatible with Shark HP100, HP152, HP153, HP100C, HP102, HP102C, HP105, HP102PET, HC450, HC450C, HC451, HC452, HC452C, HC455, HP130, HP132, UA205, UA455, UA505. ✅Compare part #HE1FKBAS, #HE1FKPET, #HE1FKBASMB. diameter- 7.56”, height- 7.17”