Point your blower a few degrees down and keep it just above the grass, then line it up with the wind behind you so the focused stream lifts leaves without scattering. Use short, turbo‑burst power surges on delicate flower beds and a narrow nozzle for tight control on wet mulch. Form a narrow gravity‑ball pile, then feed it straight into the chipper hopper—keep the base slim so it slides in easily. For dry leaves, rake a thin two‑inch layer, blow a loose top, then run the blower in vacuum mode to shred before re‑wetting. Match wet‑leaf speed to at least 150 MPH (180‑200 MPH for sticky leaves) and keep CFM 400‑700 for volume. A 12‑by‑7.5‑foot burlap tarp with grommets makes gathering shredded leaves a breeze, and regular filter and hydraulic checks keep everything humming. Keep going and you’ll uncover the rest of the tricks.
How to Position Your Blower for Maximum Leaf Lift
When you’re trying to lift a pile of leaves with a blower, the angle of the nozzle is the single most important factor—so start by pointing it just a few degrees down toward the ground. A shallow nozzle angle concentrates the airflow, keeping the stream low and focused so leaves slide forward instead of scattering. Keep the nozzle close to the grass without touching; this low placement reduces dust and gives you precise control. Now think about wind alignment. Position yourself with the breeze at your back, then aim the airflow in the same direction. Working with the wind lets you push leaves farther with less effort, and it helps you guide them toward your collection area or tarp. Adjust the angle as needed, but stay near ground level for the best lift. Use wrist‑only movement to reduce forearm fatigue. Higher CFM ratings indicate stronger airflow, which can lift heavier debris more efficiently. Check the mower’s condition before starting to ensure optimal performance. Backpack leaf blowers provide the horsepower needed for large‑area clean‑ups.
Use Short Power Bursts on Delicate Surfaces
Ever wonder why a quick, controlled blast can clean a flower‑bed without turning it into a wind‑tunnel? You’ve got the right tool when you press the turbo bursts button for a five‑second power surge. The variable‑speed trigger lets you dial back to a gentle 45‑76 mph stream, perfect for delicate surfaces like wet leaves on paving or a mulch‑protected shrub bed. Keep the nozzle narrow and aim for short, focused bursts; you’ll lift debris while the mulch stays put. The low‑speed option stretches runtime to 25 minutes, so you can work around the garden without draining the battery. Remember, the good news is you get mulching protection and precise control without over‑blowing your plants. Its compact design also fits easily in a pocket or backpack for on‑the‑go use. A typical leaf blower operates at around 70 dB which can be comparable to city traffic noise. Modern leaf blowers have become energy‑efficient tools that reduce fuel consumption while delivering high airflow. Echo’s lighter weight makes it especially handy for residential clean‑ups.
Leaf‑Blower Piling Strategy for Efficient Chipper Feeding
Ever wonder why a few well‑placed blows can turn a scattering of leaves into a solid, chip‑ready mound? You start by activating the gravity ball technique: a quick, low‑power puff pulls loose foliage toward the center of your yard, forming a tight cluster. Give it a second pass, then sweep non‑target leaves away, especially if you’re after obsidian sorting. Those shiny, high‑value leaves need separate treatment—blow the regular foliage aside, then funnel the obsidian bunches into a compact pile at the screen’s edge. Keep the mound tight; a narrow base lets you slide the leaf heap straight into the chipper hopper without extra shuffling. The good news is this method cuts repositioning time and maximizes your chipper’s feeding efficiency. Use the gravity ball multiple times to increase obsidian proportion before removal. Selecting a blower with a higher airflow capacity can further improve the speed of pile formation. Always perform a pre‑operation check to ensure the blower is in safe working condition before starting. For optimal results, consider the snow‑clearing capability of your blower when handling light, powdery snow on walkways.

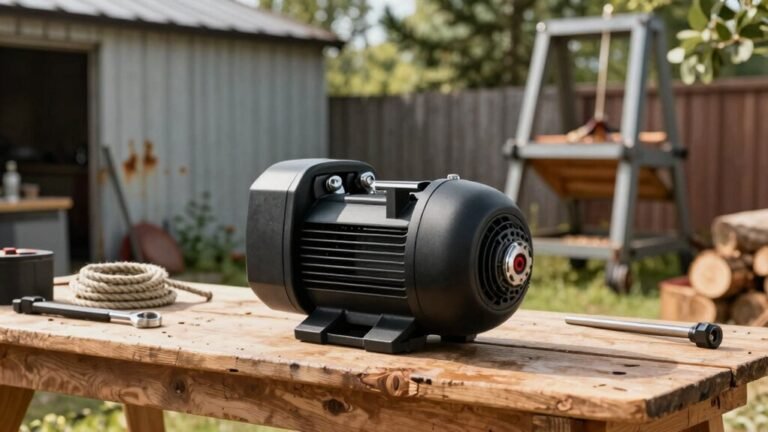
[Upgraded Brushless Motor for Superior Performance] MTkoala Leaf Blower features a 1200W upgraded brushless motor for stronger airflow, lower energy loss, less heat and 3x longer service life than regular brushed motors. With a maximum air volume of 700CFM and wind speed of 200MPH, it effectively clears dense, wet leaves, compacted debris, fine dust, packed snow, and other hard-to-access yard waste—enabling rapid, professional-grade cleaning performance.

Upgraded Leaf Blower:More than just a leaf blower—YOOVL leaf blower cordless efficiently handles light snow, dust, grass clippings, and other debris from surfaces like lawns, sidewalks and garages. A must-have for year-round yard maintenance and thorough cleanups.
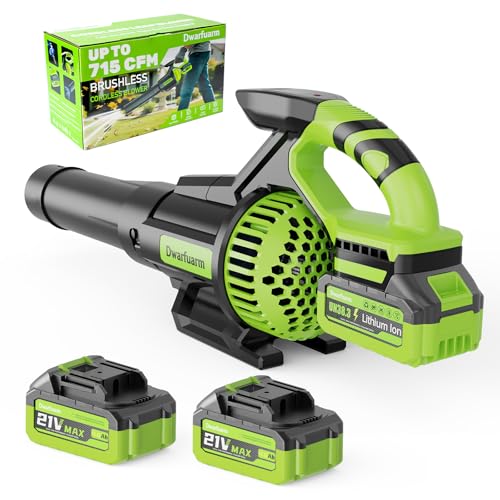
【 High-Power Airflow & Motor】–Effortlessly clear leaves, dust, and debris with 715 CFM high airflow, 200 MPH wind speed, and a 35,000 RPM brushless motor. Ideal for lawn care, patios, driveways, and garages
Prepare Dry Leaves for Clog‑Free Leaf‑Blower Shredding
If you wait until the leaves are damp, you’ll end up fighting clumps that choke your blower’s suction and waste time shuffling material. The good news is that dry leaf timing is everything—grab leaves right after a dry spell and you’ll keep moisture control simple. Start by raking leaves on a calm day, spreading them in a thin, two‑inch layer so sunlight can finish the drying job. Use a plastic‑tined rake to keep whole leaves from stacking too deep; this prevents the matting that blocks airflow. When you’re ready, run the blower in vacuum mode, letting it shred the loose, dry pieces before they can re‑wet. What most people don’t realize is that a quick sun‑dry before shredding eliminates clogs and keeps your blower humming efficiently. Adding shredded leaves as mulch after blowing can further protect soil and retain moisture. Working on wet leaves can cause the blower to overheat, creased suction can lead to motor strain. Leaf‑blower efficiency improves dramatically when the airflow is unrestricted. Checking the battery capacity before each use helps ensure consistent performance throughout the job.

7 Amp motor provides a powerful and efficient blowing performance

3-in-1 Functionality: Combines a leaf blower and vacuum combo in one versatile tool—functions as a leaf blower corded, vacuum, and mulcher. Switch between modes effortlessly without any tools, allowing for quick and efficient yard cleanup.

3-IN-1 DESIGN: Leaf blower, mulcher, vacuum in one for efficient yard work.
Pick the Right Blower Speed for Wet Leaves and Different Surfaces
How fast should you set your blower when the leaves are slick with rain and the driveway is a concrete slab? Aim for a wet‑leaf velocity of at least 150 MPH, but push toward 200 MPH if the leaves are especially sticky or the surface is uneven. On smooth concrete, a surface‑specific speed of 150 MPH clears most debris without scattering it. If you notice mud or pine needles clinging, crank it up to 180‑200 MPH and use a narrow nozzle for tighter control. Remember, higher MPH beats raw CFM when dealing with wet material. Keep your blower’s CFM around 400‑700 for volume, but let speed do the heavy lifting on hard surfaces. This balance gives you clean, efficient results without over‑exerting the motor. Leaf blower speed can significantly reduce physical strain compared to manual raking.
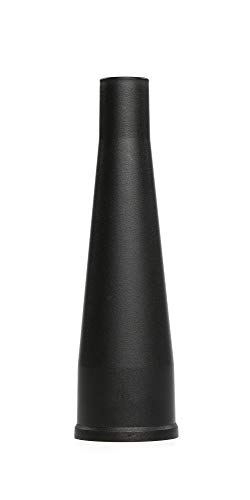
PERFECT FOR CLEARING DEBRIS: Leaf blower nozzle helps clear debris in your shop or leaves from your walkway
Universal Fit High-Efficiency Cyclone Nozzle:Transform your regular leaf blower into a high-efficiency cleaning tool. This turbo nozzle amplifies airflow speed and pressure, making it faster and easier to blow away leaves, debris, dust and snow.

191L13-5 191B21-6 Blower Nozzle, 197889-6 Flat End Nozzle Attachment
From Blowing to Shredding: When to Switch Tools
When the rain stops and the last gust of wind has cleared the driveway, it’s time to think about what comes next—shredding. You’ll notice the pile’s density and moisture level; that’s your cue for tool switching timing. If the leaves are still fluffy and loosely packed, keep blowing to gather them. As soon as the pile compresses or you see clumps forming, switch to a vacuum‑shredder or a dedicated shredder. The good news is this early switch boosts shredder efficiency, letting the fan break up material while you collect it. What most people don’t realize is that shredding before you load bags into your wood chipper reduces volume, prevents jams, and speeds up composting. So, watch the pile, and when it starts to thicken, change tools and keep the workflow smooth. Shredding increases surface area, exposing more lignan to microbes, which accelerates decomposition. Using a leaf blower can also remove excess water from the pile, which helps prevent paint streaks and improves drying speed.
Layer‑by‑Layer Leaf‑Blower Processing to Maximize Chipper Capacity
Even before you fire up the chipper, the way you feed the leaves into it can make or break your whole clean‑up day. Start by blowing a loose, dry top layer about 2‑4 inches thick; the 145‑165 mph air speed clears it without scattering. As you move to denser lower layers, crank the blower to 400 + CFM and keep the layer timing tight—don’t let a pile sit too long, or it will compact and jam the chipper. Alternate dry leaves with small twigs (½‑3 in) to keep airflow even. When the chipper spits out chips, fill your 4‑bushel bags promptly; each 30‑50 gal bag can hold several layers before you need to swap. This rhythm maximizes bag capacity and keeps the chipper humming. The high suction capability of the vacuum function ensures that even the smallest debris is captured before it reaches the chipper. Check hydraulic fluid before each use to prevent unexpected downtime. Understanding hydraulic pressure fundamentals helps you recognize why maintaining fluid levels is critical for consistent blower performance. Always verify that the stability of the work surface is maintained to prevent equipment tipping.
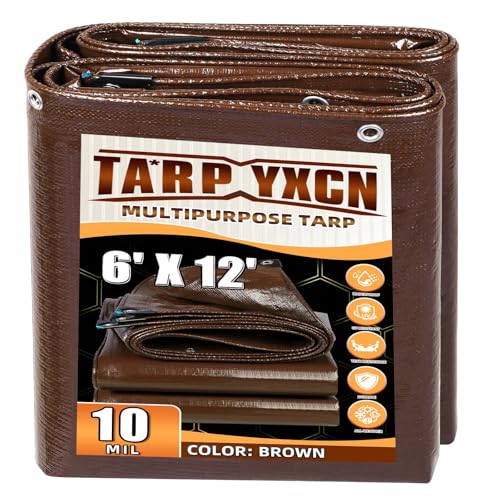
Use a Tarp With Your Leaf‑Blower to Gather Shredded Leaves
After you’ve cleared the top layer and kept the chipper humming, the next trick is to catch those shredded leaves before they scatter. Lay a 12‑by‑7.5‑foot burlap tarp on the ground, lace the grommet ropes through, and position it where your blower can funnel leaves straight onto it. As you blow, push the pile toward the tarp edge, then rake the leaves onto the sheet. Fold the corners over, pull the ropes, and you’ll get instant leaf compaction—perfect for loading into a truck or compost bin. When you’re done, roll the tarp up and store it flat; the durable material folds easily for tarp storage. This simple setup cuts down on trips, saves bag space, and keeps your work area tidy. Use a backpack blower to gather leaves quickly before they spread. Remember to check the choke setting before starting the blower to ensure a smooth ignition. Properly disposing of hydraulic fluid prevents environmental contamination and complies with local waste regulations. Always follow the safe shutdown procedure to avoid accidental start‑up.
TA*RP YXCN We are a factory that has been engaged in the production of tarps for more than 30 years. We are not middlemen and we will not falsely mark the thickness and price of the tarps.

【12 Mil HEAVY DUTY WHITE TARP】Extra thick white tarp, 6 oz / sq yard on average, Made of tightly-woven polyethylene fibers,and has a 14 x 14 weave count, heavy waterproof tarp & rip and tear proof

【Heavy Duty Silver Tarp】Crafted from premium PE material with a 14x14 weave count, this silver heavy duty tarp ensures a tight, dense fabric structure for long-lasting durability. multiple size options available to suit various needs.
Maintain Your Blower and Chipper Year‑Round
Keeping your blower and chipper in top shape all year isn’t a chore—it’s the secret to getting the most out of them and avoiding costly breakdowns. Start each session by wiping down the exterior and clearing debris from vents; a quick check prevents clogs before they start. Do seasonal filter maintenance every 10 hours, swapping out dirty air filters to keep airflow strong. Inspect spark plugs and replace them annually, and always run a fuel‑stabilization cycle before storage—add stabilizer, let the engine idle, then drain the tank if you’ll be away for weeks. Check fuel lines for cracks, replace the fuel filter yearly, and store everything dry, covered, and away from dust. Tighten loose fasteners, clean cooling fins, and keep batteries cool and charged. This routine keeps performance high and extends lifespan. Replace the fuel filter whenever it shows signs of clogging to maintain optimal flow.

Replaces part number Husq-varna # 530095646 530010897 530014362 530014815 530023364 530047004 530069216 530069247 530095649

Precise OEM Replacement: Directly replaces Husqvarna part numbers 530095646, 530069247, 530069216, and more, ensuring perfect compatibility without any fitment issues.

Compatible with: 125 BVX (2008-10), 125 BVX (2010-01), 125 BX (2008-10), 125 BX (2010-01), 125 B (2008-10)