First, park your chipper, splitter, or mulcher on level ground and slip on safety glasses, gloves, and steel‑toed boots. Locate the dipstick—usually near the engine block on a Yardbeast 3514, on top of the tank for most splitters, or under the engine cover on a DR Power mulcher—wipe it clean, reinsert fully, then pull it out to read the level. Aim for about 7/8 full; if it’s lower, you’ve got low fluid or air. Check the sight glass for bubbles, and if you see milky oil, bleed the system before adding the right hydraulic oil. The good news is that a quick check now prevents costly leaks and premature wear, and the next steps will show you how to add fluid safely and keep your machine running smoothly.
What You Need to Know Before Checking Hydraulic Fluid
Before you even get your hands on the dipstick, remember that a proper check starts with safety and a clear mind. First, you need to know which fluid type your machine uses—most wood chippers and log splitters run on standard hydraulic oil, while some newer models favor synthetic blends. The good news is that as long as you match the fluid’s viscosity and additive package to the manufacturer’s specs, fluid compatibility isn’t a mystery. What most people don’t realize is that the dipstick markings are calibrated for that exact fluid, so using the wrong type can throw off readings and cause premature wear. Check the owner’s manual, verify the fluid’s brand, and make sure the machine is level before you start. This quick prep saves you headaches later. Verify the dipstick is clean before checking the level. Selecting a fluid with the proper anti‑wear additive ensures long‑term component protection. Moisture ingress can cause corrosion and reduce hydraulic efficiency. Understanding viscosity temperature stability helps prevent performance loss under varying operating conditions.
Safety Gear and Preparation Steps for Wood Chippers, Splitters, and Mulchers
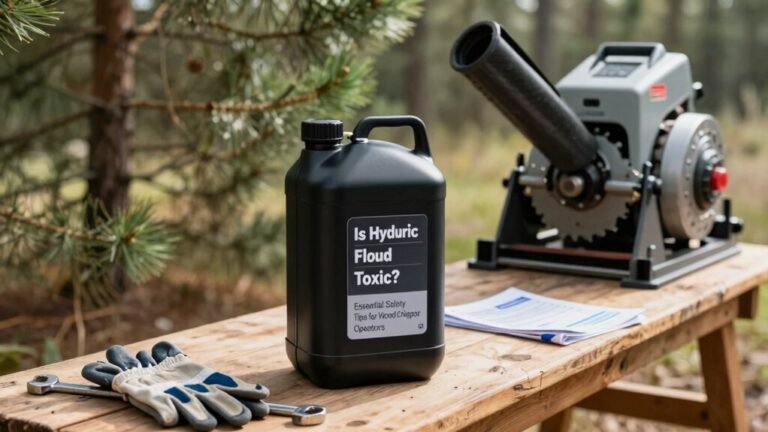
When you’re gearing up to fire up a wood chipper, log splitter, or vacuum mulcher, the first thing you should do is suit up like you’re heading into a construction site, not a backyard hobby shop. Start with a quick PPE inspection: check your safety glasses or goggles for cracks, test earmuffs for a snug seal, and make sure steel‑toed boots have solid tread. Then move to Gear donning. Slip on sturdy gloves—nitrile for dexterity or leather for heavy debris—tighten your fitted shirt, and zip up any loose sleeves. Keep jewelry and scarves out of the way, clear the work area of stray wood, and position a safety watch near the emergency shut‑off. Once everything’s secure, you’re ready to check that hydraulic fluid safely. Wear earmuffs for motor noise protection. Remember that hydraulic fluid toxicity can cause skin irritation and respiratory issues if inhaled or contacted, so always handle it in a well‑ventilated area. Air purging is essential when the system has been opened, to prevent damage from trapped air. Always store hydraulic fluids in flame‑resistant containers to minimize fire hazards.
Locating the Dipstick or Fill Port on Each Machine Type
If you’ve ever stared at a wood chipper, log splitter, or vacuum mulcher and wondered where the hydraulic dipstick or fill port hides, you’re not alone—most owners spend more time hunting for that little probe than actually checking the fluid. For wood chippers, start with the Yardbeast 3514: its dipstick unscrews counter‑clockwise near the engine block. The Forest Master FM6DD hides its fill port under a screw cap you reach only after laying the machine down. Champion 224cc models require you to remove the maintenance cover first, while Harbor Freight 62323’s dipstick threads clockwise for reinsertion. Generic drum‑style chippers follow the engine manual, placing the dipstick beside the fill cap.
Log splitters usually mount the reservoir dipstick on top of the tank near the pump. Vermeer units sport a sight glass or side‑mounted fill port, and Kubota‑powered splitters tuck theirs behind a protective guard. Horizontal splitters extend a dipstick tube from the hydraulic tank, and PTO‑driven models use a capped dipstick on a rear‑mounted tank.
Vacuum mulchers vary: DR Power places its dipstick under the engine cover, Billy Goat puts the fill port on the pump housing, and Tow‑behind models locate the dipstick near the axle assembly. Woodland Mills uses a side‑mounted sight gauge, while Agri‑Fab accesses its dipstick via a rear panel on the hydraulic system. Good dip is that most manufacturers label these ports clearly—look for dipport identification stickers or port labeling tags to avoid guesswork. The low‑oil shut‑off sensor protects the engine when oil loss occurs. Understanding hydraulic pressure helps prevent over‑pressurization during fluid checks. Selecting the proper pump type, such as a gear pump for high‑flow, low‑pressure applications, can further enhance system reliability.

Approximate Dimensions: 6-1/2" Wide x 6.5" Tall x 13" length

New Hydraulic Fluid Reservoir 3/4 NPT 40 Micron Air Breather with Dipstick 25-3

Measuring Hydraulic Fluid Level Accurately (and Interpreting the Readings)
Finding the dipstick or fill port was only half the battle; now you need to actually read the fluid level and make sense of what you see. First, park the machine on level ground, let the hydraulic system cool, and wipe the dipstick clean. Pull it out, wipe again, and fully reinsert it so the sensor viscosity marker aligns with the tank’s markings. Pull it out a second time and note where the oil meets the calibrated lines—most chippers show the bottom of the sight glass, while splitters use a ridge line on the plastic tank. Remember that temperature‑compensation matters: warm oil expands, so a reading a few millimeters high may be normal. Aim for roughly 7/8 full, never more than 10 mm above the first dipstick groove, and keep the level above the pump suction line for reliable performance. Also, check the hydraulic oil tank level to ensure it is approximately 7/8 full with AW32 oil. Understanding the different chipper types helps you select the right machine for your needs. Properly measuring the cylinder’s bore diameter ensures the replacement fits the pump’s capacity. Using the correct additive package can protect seals and prevent wear under high‑pressure operation.

Broken Dipstick Tube Extractor Kit Designed to remove broken dipstick tube pieces that remain stuck at the engine block entry point near the oil pan.

Fits Ford 289, 302, 351W, 429, 460

Accurate Oil Level Readings: This 6577459 hydraulic tank dipstick provides precise measurements, helping to prevent pump cavitation and system overheating caused by low oil levels, thereby extending the equipment’s service life.
How to Spot Low Hydraulic Fluid and Air in the System?
Even before you fire up the chipper or splitter, a quick glance can tell you if the hydraulic system’s in trouble. Look at the sight glass; if the oil is below the bottom line, you’ve got low‑pressure symptoms waiting to happen. Check the tank mark—under 7/8 full signals low fluid. For fluid‑leak detection, walk around the machine, feel hoses for wetness, and spot any puddles under the tank or hoses. Dirty patches around fittings usually mean a slow leak. Run the pump a few cycles; milky or foamy fluid and a spongy response point to air trapped in the lines. Finally, listen for cavitation noises—those are classic air‑injection warnings. Regular checks ensure the oil level remains correct for optimal performance. Using a corrosion‑resistant hydraulic fluid can further protect metal components from acidic degradation. Removing moisture with a centrifugal dryer prevents foaming and maintains fluid viscosity. Properly bleeding the cylinder before operation removes trapped air and prevents premature wear.

Reduces the operating temperature of hydraulic systems

Meets and exceeds all OEM specifications for power shift transmissions

ENGINEERED FOR HIGH-PRESSURE PERFORMANCE – Designed for systems that operate under extreme pressure, STARFIRE AW68 offers superior film strength to prevent metal-on-metal wear in critical components.
Adding the Right Fluid Without Over‑filling
Ever wonder why a few extra ounces of hydraulic oil can turn a smooth‑running wood chipper into a leaky mess? The good news is you can avoid that by respecting oil viscosity and the fill‑line. First, pull the dipstick, wipe it clean, and check the manual for the exact level—usually about 7/8 full for chippers, 3/4 for splitters. Use a narrow‑tip funnel and pour slowly; the viscous oil resists rapid flow, so a steady stream prevents splashes and air bubbles. Retract the piston fully before you start; this lets the reservoir empty back into the tank, giving you an accurate reading. Don’t forget, using the wrong viscosity can void your warranty and cause pump damage, so stick to the manufacturer‑specified grade. Shut down the hydraulic system before opening any components to prevent pressure spikes. Stop as soon as the dipstick hits the marked line—over‑filling leads to vent leaks or pressure bursts. Selecting the proper viscosity grade ensures optimal temperature stability and lubrication performance. For most residential and light‑duty units, a fluid with a viscosity of 32–46 cSt is recommended.

Package Dimensions: 16.0 H x 13.0 L x 13.0 W (inches)
Exceptionally Long Life: Designed for 6,000-hour severe service with high oxidation resistance, providing up to 3 times the lifespan of standard fluids, minimizing the need for frequent replacements

FULL SYNTHETIC - No compromise formulation, full synthetic with extremely high-performance metrics. EXTREMELY ECONOMICAL - Lowest cost per hour of operation.
Bleeding Air From the Cylinder: Step‑By‑Step for Each Machine
If you’ve ever felt that spongy, jerky motion when your wood chipper or log splitter starts to work, odds are air has snuck into the hydraulic cylinder and you need to bleed it out. Start with an air purge: attach a hose to the cylinder’s bleed port, lower the cylinder below the pump, and make sure the reservoir vent is open. For a single‑acting cylinder, advance slowly while watching the reservoir for bubbles, then retract fully; repeat at one‑third, two‑thirds, and full stroke until the oil runs clear. With a double‑acting cylinder, connect hoses to both ports, keep them upward, and cycle extend‑retract at low pressure, watching the return hose for milky flow. Keep fluid above half level, repeat two or three times, and you’ve completed the cylinder cleaning. The reservoir must be filled near the fill line before bleeding. Proper pressure control ensures the system delivers the high‑force, low‑speed motion needed for efficient wood processing. Inspect seals for wear before reassembly to prevent future leaks. A hydraulic ram pump can provide the necessary water‑driven pressure to keep the system operating smoothly.

Complete Master Cylinder Bleeder Kit: this master cylinder bleeding kit is a replacement for 14151; It includes 2 clear hoses, 10 pairs of red threaded fittings, 10 pairs of blue threaded fittings, 2 pairs of tees, a pair of clips, and a PTFE tape

🛥️ INCLUSIONS & APPLICATION: The Marine Tech bleed tube is used for all outboard, sterndrive, and inboard Seastar hydraulic helms. It makes the bleeding and filling process easier and simpler. The clear hose aids in seeing the air bubbles so you know you're doing it right from side to side. This hose makes getting the air out of a Seastar steering system super easy. If you are a professional or a do it yourself mechanic, this is a must have.

Transparent Funnel: Liquid and bubbles are clearly visible during the bleeding of bicycle brakes.
Routine Hydraulic‑Fluid Maintenance Checklist
Keeping your hydraulic fluid in top shape isn’t a mystery—it’s just a matter of a few quick, regular checks that can save you costly downtime. First, run a daily visual inspection of the fluid system: confirm the dipstick reads within ±5 % of the maximum line, peek at the sight glass for engine oil, and verify the coolant and DEF are topped up. Next, hunt for leaks around hoses, seals, and connectors; tighten any loose fasteners and replace cracked hoses. Sample the oil type regularly—if you see more than 3 % particulate, flush and filter through a 10‑micron screen. Finally, follow the scheduled servicing plan: change oil per the manual, swap filters every ten service hours, purge air after top‑ups, and document everything on your checklist. This routine keeps your wood chippers, log splitters, and vacuum mulchers humming. Always store used fluid in sealed, labeled containers and arrange for certified waste‑management disposal to protect the environment.