First, disconnect the hydraulic lines and catch any drips, then remove the gland bolts, snap rings and lock wire with a rubber mallet, screwdriver and pliers—keep the bolts set aside for later. Pull the rod out, knock the gland off, and gently take out the wiper seal, u‑seal and O‑ring. Clean everything, measure bore and rod, and match the seal kit to your fluid type and pressure rating. Re‑assemble using a cylinder hone, torque the gland to spec, lubricate the seals, and finally pressurize and bleed the system to check for leaks; the good news is that once you’ve n a this, you’ll see the full step‑by‑step guide.
Gather Tools & Materials
Before you even pop the end cap off your wood‑chipper or log‑splitter, make sure you’ve got the right tools and supplies on hand—otherwise you’ll end up hunting for a missing wrench halfway through the rebuild. Grab a rubber mallet, screwdriver, punch, pliers, and a torque wrench; these are your workhorses for gentle removal and precise re‑tightening. Add the cylinder hone, hydraulic repair stand, puller, gland‑nut wrench, and rod‑nut wrench for the heavy lifting. Don’t forget seal‑removal and installation tools, a rod straightener, Emery cloth, and an anti‑seize brush. Lay out safety protocols: wear gloves, eye protection, and keep your workspace clean. Finally, check tool maintenance—inspect heads, clean threads, and lubricate moving parts before you start. Understanding hydraulic pressure is essential for selecting the correct seals and preventing leaks. Regular fluid testing can reveal early signs of contamination before they cause costly damage. Always inspect the fluid level before beginning any disassembly to confirm the system is properly drained.

SIZE - Set of 2 wrenches, suitable for gland nuts with a pin hole size of ≥ 1/5 inch. The larger wrench is adjustable from 2 to 6 inches and the smaller wrench is adjustable from 1 to 3.75 inches.

【Universal Compatibility】 Hydraulic Seal Installer and pick and hook set are quick and safe installation tools for flexible rod seals. 3 sizes to cover most rod seal installation job from 0.87" up (Rod Diameters): (S) 22-40mm (0.87"-1.57" Rod) gland hole ; (M) 40-70mm (1.57-2.75" Rod) gland hole; (L) 70-165mm (2.75"-6.49" Rod) gland hole.

【Universal Compatibility】 4 Size Hydraulic Seal Installers with Surface Mountable Twistor Handle Block and 2-Angles Seal Pick Multitool is a quick, safe and complete installation tool for flexible rod seals. 4 sizes to cover most rod seal installation job from 0.7" up (Rod Diameters): (XS) 20-30mm (0.7”-1.187” Rod) gland hole; (S) 30-50mm (1.187"-2" Rod) gland hole; (M) 50-70mm (2-2.75" Rod) gland hole; (L) 70-165mm (2.75"-6.5" Rod) gland hole.
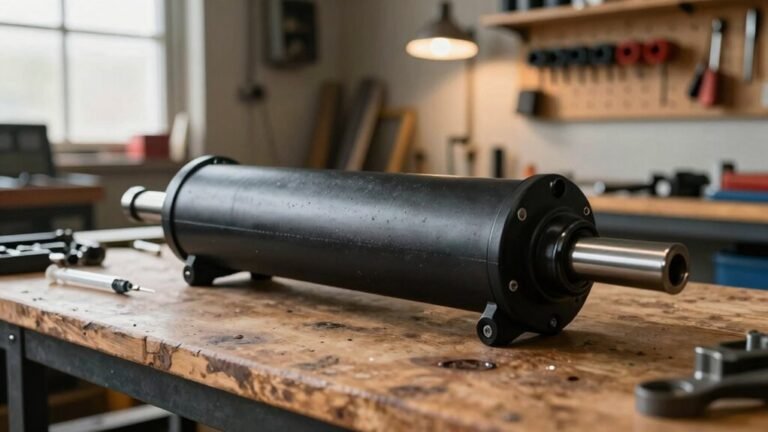
Step‑by‑Step Disassembly of a Wood Splitter Cylinder
Once you’ve got your safety gear on and the fluid catch‑bucket in place, start by disconnecting the two hydraulic lines that feed the cylinder. Unscrew each fitting, catch any drips, and set the valve assemblies aside as a unit. Next, remove the gland’s bolts and washers—consult the torque specs for the 5 mm hex bolt, so you don’t over‑tighten later. Use a punch to drive back the snap rings, then pull out the lock wire and any C‑clips. Push the gland back into the barrel, pull the piston rod straight out, and knock the gland off the rod with a hammer or punch. Keep seal safety in mind: handle wiper seals, u‑seals, and o‑rings gently, and set them aside for later inspection. Remember to use a flat‑head screwdriver for loosening the face plate when exposing the C‑clip. After the cylinder is fully disassembled, be sure to purge air from the hydraulic lines before reassembly to prevent damage and ensure smooth operation. Always inspect the hydraulic fluid level before re‑installing the cylinder to confirm proper lubrication. Pressure relief valves should be opened fully before any disassembly to guarantee the system is depressurized.
Inspecting Wood Splitter Cylinder Components
After you’ve got the gland out and the seals set aside, the next step is to give every piece a good look‑over. Scan the main beam and frame for cracks, bends, or rust—any sign of material wear can compromise the safety‑standard you rely on. Tighten every bolt, nut, and fastener; loose hardware is a common leak source. Inspect the wedge and piston for heavy wear or wobble, and check the rod’s straightness. Look for hydraulic fluid around the cylinder, pump, and hoses; a drip means a failing seal or hose that needs fixing now. Verify the coupling keys are square and half‑moon as designed. Finally, clear debris from the drive area so wood chips don’t hide future problems. The seals were missing and replaced with improvised parts, which is why a thorough inspection is essential. To ensure complete air removal, follow a bleed‑cylinder procedure that locates the highest point of the system and cycles the cylinder until no bubbles appear. Regularly check the hydraulic fluid level to maintain optimal pressure and prevent overheating. Wearing protective gear is essential before beginning any inspection or repair work.
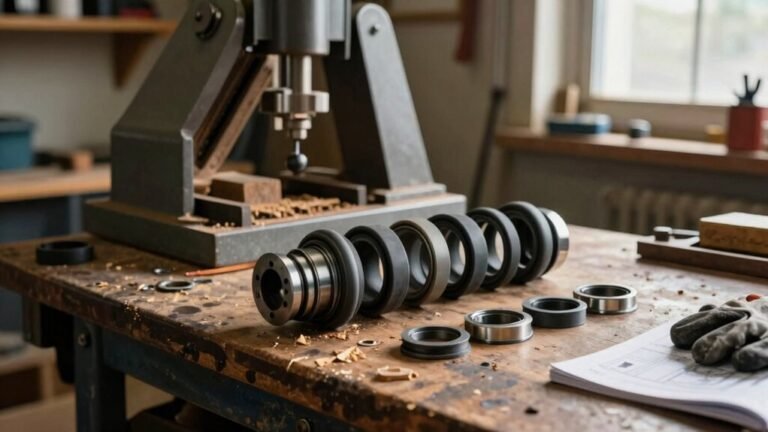
How to Pick the Correct Seal Kit
If you’re staring at a pile of old seals and wondering which set will actually fit your wood‑splitter cylinder, the good news is you don’t need a PhD in hydraulics to figure it out. First, hunt down the cylinder’s part number on the nameplate or stamped tag; give that P/N to your supplier for a 100 % match. If the plate’s missing, pull the machine’s model and serial number and let the OEM database cross‑reference the right kit. When those routes fail, measure bore and rod diameters with calipers, then compare to ISO standards. Pay close attention to seal material selection—nitrile works for most fluids, but high‑temperature or aggressive fluids need fluoro‑elastomers. Finally, verify the pressure rating meets or exceeds your splitter’s maximum hydraulic pressure; overspecifying is safer than underspecifying. Proper seal kits ensure a perfect fit. Selecting the right rod seal material can dramatically reduce wear in abrasive environments. The viscosity stability of hydraulic fluid is essential for consistent power transmission. Choose a fluid with a 32–46 cSt viscosity range for most residential units to maintain optimal performance.

【Fitment】Widely fit for Bobcat Equipment Models 444, 500, 520, 530, 533, 540, 542B, 543, 600, 610, 620, 630, 642, 642B, 643, 700, 720, 721, 722, 730, 731, 732, 741, 742, 742B, 743, 743B, 743DS, 751, 753 and more.

Perfect Fit: VEHIFOMO Hydraulic Log Splitter Cylinder Rebuild Seal Kit is engineered for precise compatibility with 4.0" Bore (I.D.) x 1.75" Rod (O.D.) Cylinders. Ensure a seamless fit by verifying your hydraulic cylinder's dimensions before purchase

Seal Size: 4.0"Bore x 1.75"
Reassembly Tips for Wood Splitter Cylinders
Even before you start tightening bolts, the most important thing is to make sure everything’s clean and properly lubricated. Lay out each part in order, then double‑check seals, O‑rings, and gaskets for correct orientation. When you push the head into the barrel, use a custom tool or a gentle tap—don’t force it, or you’ll damage the internal rings. Follow safety protocols: wear gloves, keep the work area clear, and never bypass torque specs. Tighten the splitting block and end fittings firmly, then cycle the piston manually to feel smooth movement. A quick cost analysis shows that taking a few extra minutes now prevents expensive downtime later, saving both time and money. The inner wire must be extracted before reassembly to avoid damaging the new seals. Always verify that the cylinder’s hydraulic fluid is free of contaminants before re‑pressurizing. Selecting the right pump type, such as a gear pump, can greatly influence system reliability and efficiency. Proper containment of any spilled fluid is essential to protect the environment and comply with disposal regulations.

Application : Hydraulic Cylinder Repair Tool kit For Hydraulic Cylinder skid steers, loaders, backhoes.Made of high-quality steel and rubber materials, our professional technology makes the products more high-quality, durable and rust-free, which provides great convenience for maintenance workers.

【Hydraulic Seal Installer】 Hydraulic Seal Installation Tools is a quick and safe installation tool for flexible rod seals. 3 sizes to cover most rod seal installation job from 0.87" up (Rod Diameters): (S) 22-40mm (0.87"-1.57" Rod) gland hole ; (M) 40-70mm (1.57-2.75" Rod) gland hole; (L) 70-165mm (2.75"-6.49" Rod) gland hole.

Strong Sealing: Our hydraulic cylinder sealing kit is made of high quality material with excellent wear resistance and smooth burr-free surface, which provides a perfect fit and prevents oil leakage and deformation, ensuring that your wood splitter is long-lasting and reliable
Test and Troubleshoot the Rebuilt Cylinder
Now that everything’s clean, lubed, and bolted, it’s time to put that rebuilt cylinder through its paces and make sure it won’t leak or seize when you fire up the wood chipper. Start with a pressure testing routine: close the directional valve, adjust the relief valve, and slowly build pressure while watching the gauge. If the reading holds steady, you’ve got a good seal; if it drops, you’ve got a leak. Next, do a seal inspection. Spray acetone on the rod and barrel, shine a flashlight, and look for scratches, dents, or uneven O‑rings. Check rod straightness and bore smoothness, then cycle the cylinder a few times to purge air. The good news is, once the pressure stays constant and the seals look clean, you’re ready to run the chipper without fear of a surprise failure. Seal wear can cause oil to bypass the piston, leading to drift. Monitoring hydraulic fluid temperature helps prevent overheating that can accelerate seal degradation. Remember to wear appropriate personal protective equipment and use absorbent pads to contain any accidental fluid spills during testing. The hydraulic ram’s pulsating surge can also be harnessed to provide supplemental power for the chipper’s drive system.

Multiple Size:#4 (1/4" Flat Face), #6 (3/8" Flat Face), #8 (1/2" Flat Face), #10 (5/8" Flat Face), #12 (3/4" Flat Face), #16 (1" Flat Face), #20 (1-1/4" Flat Face), #24 (1-1/2" Flat Face), #32 (2" Flat Face) O rings.

【Universal Compatibility】 Hydraulic Seal Installer is a quick and safe installation tool for flexible rod seals. 3 sizes to cover most rod seal installation job from 0.87" up (Rod Diameters): (S) 22-40mm (0.87"-1.57" Rod) gland hole ; (M) 40-70mm (1.57-2.75" Rod) gland hole; (L) 70-165mm (2.75"-6.49" Rod) gland hole.

Application -Seal Kit Compatible with HC5340, HC5341, HC5342, HC5343, HC5344, HC5345, HC5346, HC5347, HC5348, HC5358, HC5365, HC5375, HC5394, HC5445, HC6750, HC6751, HC6752, HC6753, HC6754, HC6755.