Your leaf blower’s carburetor probably just needs a thorough cleaning—and you can handle it yourself. Start by draining the fuel, disconnecting the spark plug, and removing the air filter. Then disconnect your fuel lines and throttle linkage, blast away exterior gunk with compressed air, and carefully clear each jet and passage with a thin wire or fishing line. Rinse everything with carburetor cleaner, dry completely, reassemble carefully, and test your spark before firing it up. Adjust the idle screws once it’s warmed, and you’ll be back in business without dropping cash on a mechanic.
Drain the Fuel Tank and Set Up Your Workspace
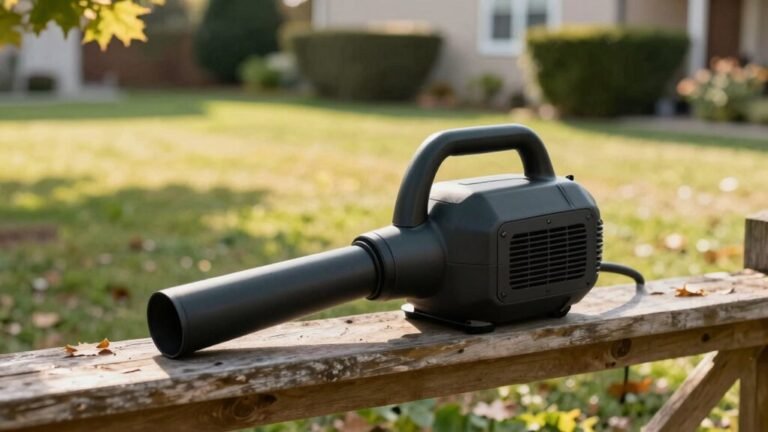
Before you even think about touching your leaf blower’s carburetor, you’ve got to get the fuel situation handled—and this is where most people make mistakes that turn a simple cleaning job into a messy headache. Start by positioning your blower on a flat surface, then let that engine cool completely. Disconnect the spark plug wire—seriously, do this—to eliminate spark safety risks. Remove the gas cap slowly to release pressure buildup. Set up your workspace with proper ventilation; you’ll want fresh air flowing because gasoline fumes aren’t something to mess around with. Grab rags, a non-melting container, and your tools. The good news is taking these prep steps takes just minutes but prevents disasters. Stale fuel can cause poor start and engine performance issues, so draining old fuel before carburetor cleaning ensures you’re working with a clean system. For large properties, a backpack blower can reduce fatigue during extended cleaning sessions. Hydraulic fluid levels should be checked regularly to maintain optimal performance and prevent equipment damage. Always consult the owner’s manual for specific safety procedures before beginning any maintenance.
Remove the Air Filter and Carburetor Cover
Now that you’ve got your fuel drained and your workspace set up, it’s time to expose that carburetor—and you’ll need to work through the air filter assembly first. Start by unthreading the screws or knobs holding your air filter cover in place, then lift it off carefully. Next, remove the foam or felt filter element from its housing and inspect it during this filter troubleshooting phase—you’re checking for excessive dirt buildup that might indicate maintenance issues.
Pull the breather hose from the back of the air filter base if your model has one. Once that’s done, unscrew the filter base itself, which typically sits between the filter and carburetor. Before reassembly, perform a carburetor seal inspection to ensure gaskets are intact and properly seated. Clean everything with brake cleaner before proceeding. With the air filter cover disassembled, place the foam element in water with soap to remove accumulated debris and contaminants. Consider the noise level differences between gas and electric models when deciding how much cleaning is needed for frequent use. Understanding airflow volume helps you gauge how much debris the blower can move efficiently.
Disconnect Fuel Lines and Throttle Linkages
With your air filter assembly out of the way, you’re ready to tackle the fuel lines and throttle linkages—and here’s the thing, this is where most people get a little nervous because fuel’s involved. Before disconnecting anything, clamp those fuel lines to prevent spillage. Note your fuel line orientation carefully—the short line’s your intake, the long one’s your return. Take photos showing throttle cable marking and attachment points. Gently pull the fuel lines from the carburetor ports; use pliers if they’re stubborn. For throttle linkage, mark everything with a marker before removal. Disconnect the cable from the carburetor lever and release those two fastening clips holding the primer bulb. Document everything—your reassembly will thank you. When reconnecting fuel lines during reassembly, use pliers to hold connector to prevent the fuel line from entering back into the tank. Also, verify that the ignition switch is functioning properly to avoid startup failures. A dead battery can also prevent the engine from cranking, so check the battery charge before proceeding. Follow the safety checklist to ensure you are protected while working with fuel.

Secure hose connections effortlessly – Hose clamps are ideal for automotive fuel lines, marine applications, lawnmowers, and motorcycles. No more leaks with the spring-loaded clamp’s tight seal

150-piece Fuel Line Clamps with Organized Storage Case: Includes spring band hose clamps in 6 sizes (7mm 8mm 9mm 10mm 11mm 12mm) to fit a wide range of hose. The labeled, reusable plastic case allows quick size selection and saves time during repairs. Once the original hose clamps are used up, the labels can be easily DIY-printed, letting you refill and reorganize the case with new parts for continued use

Comprehensive Fuel Line Set: This fuel line kit comes complete with four different sizes of fuel line hoses, providing versatile options for various small engine applications.
Wash Off the Outside First
Once you’ve got those fuel lines and throttle linkages documented and safely disconnected, your carburetor’s ready for its first cleaning phase—and here’s the thing, you don’t want to skip this step because it’s way easier to prevent gunk from going deeper into the engine than it is to fish it out later.
Start by blasting the exterior with compressed air to dislodge loose debris. Use a soft brush to work away visible dirt, grass, and twigs clinging to the outside surfaces. This prevents contaminants from entering internal passages when you apply cleaner. Spray carburetor cleaner generously across the exterior, targeting deposits and crusty buildup around the fuel lines and filter housing. Wipe everything down with a clean rag, then blow-dry thoroughly with compressed air. For leaf blowers frequently used on sidewalks and outdoor surfaces, prolonged operation can cause stubborn gumming that requires extra attention during this initial wash phase. You’re protecting those delicate internal components before disassembly. Echo’s design often includes a low‑vibration motor that helps reduce wear during routine maintenance. Always verify the fuel mixture ratio before cleaning, as an incorrect mix can lead to engine performance issues during operation. Wet foliage can increase the risk of slipping, so it’s wise to dry the area before starting the cleaning process.

Powerful Degreaser (CLD_201_16SW) - Signature Series Orange engine cleaner and degreaser spray quickly breaks down grease, oil, grime, and dirt on engines, tires, undercarriages, tools, and more for a deep professional clean

Fixes rough running and hard-to-start engines: Breaks down gum and varnish that cause rough running, hard starts, sputtering, and no-start issues in small engines, helping restore performance quickly

Cleans and degreases all unpainted metal parts, carburetors, air intakes, throttle Bodies, break Drums, Brake rotors and calipers
Clear Jets and Passages
After you’ve scrubbed down that exterior and you’re confident no dirt’s sneaking into the engine, it’s time to tackle what’s really gunking up your leaf blower—the jets and passages inside.
Jet blockage is the main culprit behind poor performance, so here’s what you’ll do. Grab a thin wire, needle, or fishing line and carefully push it through each jet opening to dislodge debris. For stubborn clogs, use a small wire brush or even an old toothbrush to scrub away buildup. Once you’ve cleared the passages mechanically, hit everything with carburetor cleaner spray, focusing on those tiny openings. If you encounter particularly stubborn blockages, torch cleaning tips applied cautiously can help dissolve tough deposits that mechanical methods won’t budge.
Finally, use compressed air to verify airflow clearance through all jets. Hold each one up to light—if you can’t see through it, you’re not done yet. Hydraulic ram pump can also illustrate how pressure differentials drive fluid movement. viscosity stability is essential for maintaining consistent performance across temperature variations.

Helps overcome: hard starting, rough idling, stalling, high exhaust emissions

Helps overcome: hard starting, rough idling, stalling and high exhaust emissions

Extra strength cleaning power: Specially formulated with solvents that effectively break down carbon, gum, and varnish deposits to restore cleaner and smoother engine operation
Know When to Replace Your Diaphragm
Sometimes your leaf blower won’t cooperate no matter how thoroughly you’ve cleaned the carburetor, and that’s when you’ve got to suspect the diaphragm. Here’s the thing—if you’re still experiencing rough idling, hesitation during acceleration, or poor fuel economy after cleaning, diaphragm wear is likely your culprit.
Start with a visual inspection. Remove the primer bulb to access the diaphragm and compare it against a new one. You’re looking for discoloration, stiffness, cracks, or tears in the material. A fuel‑stain inspection reveals prolonged exposure damage—old gas residue creates hardening and degradation that cleaning alone won’t fix. On cheaper residential models like budget Echo blowers, diaphragm failure occurs more frequently than commercial‑grade equipment.
If the diaphragm shows visible wear or damage, replacement is your answer. Don’t waste time with repeated cleanings. A repair kit costs little and restores proper fuel delivery instantly. Proper nozzle selection can also improve airflow and reduce strain on the diaphragm. Using a lawn mower to shred leaves can provide additional material for mulch, which helps retain moisture in the soil. Power source differences affect overall maintenance requirements.

Suitable for leaf blowers, trimmers, brushcutters and other gas-powered equipment using Zama C1Q/C1U series carburetors. Ideal for home and garden maintenance

Replace Part Number: Compatible with Wal-bro K10-WAT D10-WAT,Compatible with Echo 12310016330

Replace: K10-WAT, D10-WAT. Fits most WA and WT series carburetors. Replace Echo number: 12310016330. This K10-WAT kit is an extremely common carburetor rebuild kit used on several different brands of 2-cycle equipment including Edger, String Trimmer, Leaf Blower, Chainsaw and more. Some of these brands are Poulan, Weedeater, Ryobi, Ryan, IDC, Homelite, Lawnboy, Toro, McCulloch, Craftsman and more.
Rinse, Dry, and Reassemble
Now that you’ve got your carburetor torn down and thoroughly cleaned, it’s time to make sure every last bit of gunk is gone and everything goes back together right.
Start your rinse techniques by spraying carburetor cleaner on all exterior surfaces, then work it through interior passages using fishing line if needed. Avoid scratching brass components—those precision holes don’t need enlarging.
For dry methods, blow out passages with compressed air and let everything air dry completely. Wipe those needle valves clean with a rag and confirm no moisture lingers in fuel passages or jets.
Before reassembly, organize your small parts carefully, verify fuel lines, and align all screw holes. Check that gaskets remain in place and diaphragms look intact. You’re almost there.
Remember that operating a leaf blower within the recommended hydraulic fluid temperature range helps prevent overheating and ensures optimal performance. Also, perform a quick pre‑flight check of the choke and throttle settings before the first use. Consider adding a filter mesh to your leaf vacuum to capture larger debris before it reaches the engine.
Reinstall the Carburetor
With your carburetor sparkling clean and completely dry, you’re ready to slip it back into place. Start by positioning the manifold gasket between your carburetor and engine—proper gasket alignment here prevents vacuum leaks that’ll cause headaches down the road. Next, carefully push the carburetor into position while guiding the fuel lines away from any screw paths. Reconnect those lines to their matching nipples—they’re usually labeled, so you won’t mix them up.
Now hook your throttle linkage bar into the carburetor slot and secure everything using the appropriate screwdriver for your fasteners. When tightening, apply even carburetor torque alternately across bolts to prevent stripping. The good news is you don’t need to muscle anything—snug is plenty. Finally, reinstall your air filter base and choke cover, confirming all linkage moves freely before firing it up. After reassembly, verify choke operation by pulling the throttle and releasing it to ensure proper functionality. Remember that hydraulic fluid can be highly flammable, so keep any nearby spills away from hot engine components.
Test Your Engine and Adjust Idle Speed
Before you declare victory and pack away your tools, you’ll want to verify that your carburetor cleaning actually fixed the problem—and that means getting your engine running and dialed in properly.
Start with spark plug testing to confirm ignition’s working correctly. Disconnect the spark plug wire, remove the plug, and ground it to the engine block. Pull the starter cord and look for a visible spark. If you’re not seeing one, you’ll need ignition coil diagnosis before proceeding further. Proper grounding ensures safety during this diagnostic test and prevents false negatives from occurring.
Once you’ve confirmed spark, reinstall the plug temporarily and attempt a start. Remove it again immediately to prevent runaway.
Now for the fun part—idle speed adjustment. Locate your carburetor’s L and H screws. After warming up, turn the L screw until your engine idles smoothly without stalling or racing. You’ve nailed it when everything runs clean and consistent.