Skip the expensive chipper—you don’t need it. Grab free wood chips from local arborists and tree services, then soften branches with water or paint thinner. Hand-chop them into inch-sized pieces with a hatchet, or smash soaked wood in a trash can with a hammer. Stack everything in a sunny pile, layering carbon-rich wood with nitrogen sources, and let decomposition do the heavy lifting. You’ll save hundreds while building garden gold from yard waste.
Why Skip the Wood Chipper? Benefits of DIY Mulch Methods
Before you drop another $500–$1,500 on a wood chipper you’ll use maybe twice a year, here’s something worth considering: you don’t actually need one. Here’s the thing: DIY mulch methods deliver serious cost savings without the equipment investment. You’ll source free wood chips from landscape services, eliminating ongoing mulch purchases. What most people don’t realize is that manual processing requires minimal tools compared to chipper equipment.
The environmental impact? Significant. You’re diverting yard waste from landfills while avoiding machinery fuel consumption and carbon emissions. Your DIY approach creates chemical‑free mulch uncontaminated by industrial pollutants. The good news is that branches and prunings decompose naturally, improving soil health over time. Fungal activity drives the decomposition process, breaking down wood materials into valuable humus that enriches your garden beds. You’ll reduce dependency on commercial mulch supply chains entirely. It’s sustainable, practical, and your wallet—plus the planet—will thank you. A hydraulic ram pump can provide the necessary pulsating surge to power a wood chipper in off‑grid settings. Selecting the proper hydraulic fluid viscosity, such as ISO VG 32‑46, ensures the pump operates efficiently under varying loads. Understanding pressure‑flow relationships helps you size the pump correctly for consistent performance.
Source Free Wood and Bark Locally
Now that you’ve decided you don’t need to shell out hundreds on a chipper, you’re probably wondering: where do I actually get free wood and bark?
Here’s the thing—free wood sources are everywhere if you know where to look. Check Craigslist, Freecycle, and local Facebook groups where homeowners constantly post tree removals and free wood. The good news is tree services actively seek drop sites for chips and logs, so contact local arborists about picking up material. Municipal parks departments and landfills often stockpile trimmed branches and bark sources you can grab. Services like ChipDrop connect tree companies directly with homeowners needing wood deliveries.
Don’t overlook lumber mills, woodworking shops, and landscaping firms—they’re practically begging to offload scraps. What most people don’t realize is networking within your community attracts specific bark sources and tree types you actually need. Backpack blowers can be especially useful for moving large piles of collected wood efficiently. Wear protective gear to prevent injuries while handling heavy logs. Properly maintained hydraulic hoses ensure safe and reliable operation of any wood‑processing equipment you might later use.
Soften Wood Before Processing
One thing that’ll make your DIY mulching life infinitely easier is softening your wood before you start breaking it down—and you’ve got several solid methods to choose from depending on what materials you’re working with.
Water soaking’s your easiest bet: submerge dry wood for 10-30 minutes with weights holding it under. You’ll notice dramatic improvement in carvability compared to kiln-dried stuff. If you’re after faster results, boiling water works wonders on thicker pieces, though watch for cracking risks.
For aroma reduction and cleaner processing, try a 50/50 distilled water and rubbing alcohol spray—70% strength gives optimal softening without residue. Paint thinner and kerosene also work, though they require proper evaporation time before handling.
Whichever method you choose, softened wood breaks down easier without stressing your equipment or dulling blades during that crucial device inspection before starting. Once your mulch is processed and applied at 1–2 inches thickness, it will conserve soil moisture and enhance the effectiveness of soil amendment products. Properly bleeding air from hydraulic cylinders before use can further protect your equipment from premature wear.
When removing wet leaves, using a leaf blower can be hazardous because slip risk increases on damp surfaces. Selecting hydraulic fluid with the correct viscosity helps maintain consistent pressure during softening processes.

𝐏𝐄𝐑𝐒𝐎𝐍𝐀𝐋𝐈𝐙𝐄 𝐘𝐎𝐔𝐑 𝐁𝐀𝐓𝐇 𝐓𝐈𝐌𝐄 (𝐖𝐇𝐈𝐓𝐄 𝐄𝐃𝐈𝐓𝐈𝐎𝐍): Turn your bath into a personalized spa retreat with this elegant white bathtub caddy tray. Perfect for holding all your bath essentials—soap, bath salts, candles, a glass of wine, your phone, tablet, or favorite book—everything stays neatly in place and within easy reach, thanks to smartly designed compartments and built-in holders.

Manicure treatment tool:clear and transparent, easy to see water level and cleanliness sleek and modern,finger soaking bowls

Manicure tool: wide uses, used for artificial nail removal, nail polish removal, nail nutrition treatments,manicure bowl
Chop Branches Into Mulch by Hand
If you’ve softened your wood and you’re ready to skip the chipper altogether, chopping branches by hand is absolutely doable—and honestly, it’s more manageable than you’d think. Start by cutting your smashed limbs into 1‑inch pieces using a hatchet, pulling branches taut and working downward for precision cuts. Focus on hand safety by wearing work gloves and keeping your fingers clear of the blade’s path. Process softened sections into uniform mulch‑sized segments, keeping your tool maintenance sharp—a dull hatchet requires more force and invites accidents. Work in batches under one hour each; you’ll find the rhythm quickly. Separate dead branches from green ones to ensure faster processing and higher‑quality mulch output. The good news is that manual chopping, while requiring effort, delivers consistent results without the chipper’s noise or expense. Remember to check the fuel level before beginning any outdoor project. Understanding the differences between drum, disc, and screw chippers can help you decide when a machine might be worth the investment later. Use a steady, sweeping motion to cover larger areas efficiently, and consider noise reduction techniques to minimize disturbance.

► EASY TO USE: Our Camping Axe is designed for easy chopping Of Firewood, Logs, Kindling and Branches. The Optimized blade geometry is designed for maximum efficiency to give you more one-strike splits. Ideal for campers, hikers, outdoor activities, preparing wood for bonfires and garden work.

YOUR GO-TO AXE: Perfect for chipping logs, small trees and branches, as well as splitting firewood and kindling
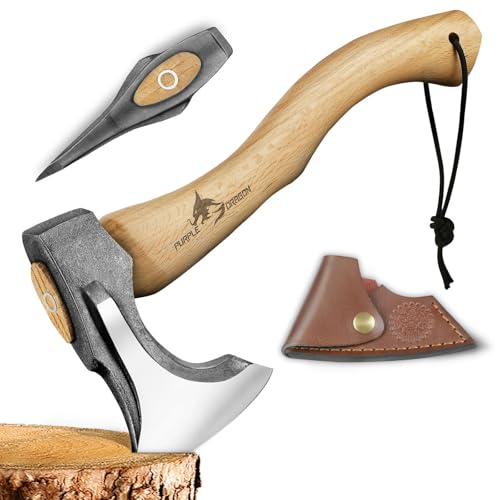
UNIQUE DESIGN: This forestry axe with cow foot is ideal for splitting wood and delimbing. Ideal for forest, bushcraft and garden work. The optimized blade geometry is designed for maximum efficiency to give you more splits in one stroke. The head of these axes is firmly attached to the handle by two ring wedges, making it more secure and preventing it from falling off when swinging
Make Mulch by Smashing Softened Wood
Before you grab that hatchet or fire up the chainsaw, understanding how to properly smash softened wood is where the real magic happens—and it’s honestly simpler than you’d expect.
Start by soaking greener branches in water for moisture control—this prep work makes everything easier. Load softened limbs into a trashcan and use a heavy hammer to smash them until they thread apart. For drier material, smash until it breaks into dust.
Here’s the thing: work in small batches over multiple sessions, totaling around five hours. Pierce softened logs with a pitchfork to confirm they’re ready, then crumble rotted chunks by hand. These mulching techniques transform woody debris into soil-building gold, and you’ll accelerate decomposition without fancy equipment. The carbon-nitrogen balance in your homemade mulch prevents nitrogen depletion while adding beneficial microbes to your garden soil. Always keep a fire extinguisher nearby, as hydraulic fluid can ignite unexpectedly when equipment overheats.
Recognizing a sweet petroleum odor can help spot leaks early. Use proper ventilation when working indoors to avoid inhaling harmful fumes.

Package Includes: 1 x Wooden Mallet ( 3.2 Inch x 2.3 Inch x 2.3 Inch / 82.5mm x 58mm x 58mm )

Forged Carbon Steel Head for More Durability

Durable rubber mallet hammer head for soft blow strike that doesn’t damage
Beat Dried Bark Into Fine Mulch
Once you’ve got a pile of dried bark ready to go, you’ve actually got more options than you’d think for turning it into usable mulch—and here’s the thing, most of them don’t require dropping serious cash on a dedicated wood chipper.
Your vacuum blower combo tool works surprisingly well on pine bark. Since bark drying guarantees the material stays lightweight, the blower progresses from shredding larger pieces down to finer debris without damaging what you’ve already processed. It’s honestly one of the cleanest approaches. For best results, tilt the blower at an angle to feed bark into the chamber and operate in short bursts to prevent jamming.
Alternatively, that old meat grinder sitting in your garage? Run it backwards first to pulverize nuggets, then forwards to extrude crumbled bark. Sift the output to dial in your desired mulch texture. You’ll end up with consistent, usable material that rivals commercial products.
Check the system’s highest point to ensure any trapped air can escape efficiently during the bleeding process.
Consider using a leaf blower on light, powdery snow to clear pathways quickly before tackling the bark.
Electric blowers are generally quieter due to fewer moving parts and the absence of a noisy internal combustion engine, making them a low‑noise option for residential use.

7 Amp motor provides a powerful and efficient blowing performance

Powerful Performance – This leaf blower delivers an impressive 210 MPH airspeed and 390 CFM airflow, this corded leaf blower easily clears leaves, debris, and grass clippings from your yard, driveway, and patio.

Efficient Cleaning: Upgraded leaf blower cordless eliminates the limitations and bulky feeling of traditional leaf blowers with ropes. It can quickly blow away lightweight objects such as leaves and dust, making your cleaning work easier. Suitable for courtyards, parks, streets, and other places.
Pile Wood and Branches for Slow Decomposition
While your leaf blower and wood chipper can make quick work of fresh material, there’s real value in letting nature take its time with larger logs and branches—and you don’t need any power equipment to make it happen. Start with proper soil pile placement by positioning your stack in full sun for at least six hours daily. Bury lower logs a few centimeters into soil to maintain moisture and support the microbes doing the heavy lifting. Stack logs to create nooks for insects while keeping the center wetter for faster rotting. For moisture control, keep your pile consistently damp like garden soil—this dissolves nitrogen and speeds breakdown. Build to at least one cubic meter, alternating carbon-rich and nitrogen-rich layers. Shredding thick branches beforehand with pruning shears or a hatchet will increase surface area for microbes and help material mix more easily throughout your pile. You’ll have finished mulch in months without touching a chipper. A well‑designed pile also benefits from parallel token output to speed up the decomposition process. Applying a splitting wedge can help break down stubborn logs more efficiently before stacking.
Stack Bark Sheets and Leaves Into Mulch Beds
If you’ve got a leaf blower but no wood chipper—or you’re just looking for a method that doesn’t require firing up another piece of equipment—stacking bark layering with leaves directly into your garden beds is genuinely one of the easiest ways to create mulch while it breaks down in place.
Start by clearing weeds and watering your soil thoroughly. Rake leaves into piles, then alternate bark sheets with leaves in 3-6 inch layers. Stack bark flat as your base, topping with leaves for better retention. Use boards to contain edges and prevent materials from blowing around.
The good news? This leaf mulch method suppresses weeds, retains moisture, and insulates soil—all while decomposing into valuable amendments. Maintain a 2-4 inch gap from plant stems, and you’re done.
Spread Your Homemade Mulch Around Plants
Now that you’ve got your homemade mulch ready to go, the real work begins—but don’t worry, it’s the straightforward part where you’ll actually see your garden transformation happen. Start by dropping mulch in strategic piles, then rake outward for even coverage. The key to successful soil mulching is maintaining that 2-3 inch depth consistently across beds.
Here’s the thing: spacing matters tremendously. Keep mulch 6 inches away from plant bases to prevent rot and guarantee airflow. For trees, extend your coverage to the drip line management zone—that’s where most root activity happens. Never pile mulch against trunks or stems. Use your hands or a rake for smaller areas, working methodically around each plant. Water everything afterward; moisture penetrates mulch easily and establishes your newly applied layer. Organic mulch will gradually break down over time, adding nutrients to your soil and improving its overall health.

✅ 【Sharp Dual-Sided Metal Tines】- Engineered with hardened, knife-like tines on both surfaces. Aggressive side digs into thatch and compacted soil, while the smoother side refines seedbeds and gathers lightweight debris.

Heavy duty 1" diameter expandable metal rake for leaves painted black to prevent rusting and bending under heavy use.

Thickened 1" diameter yard rake with rustproof&skidproof old school polish and paint spraying is stronger for heavy yard duty without snaps.
Common Mulch Myths: What Won’t Harm Your Soil
You’ve probably heard plenty of scary stories about mulch ruining your soil—nitrogen depletion, mysterious acidity, diseased wood turning your plants into casualties—but here’s the thing: most of what people worry about when it comes to mulch is just plain wrong.
Let’s debunk the biggest myths. Surface mulch won’t rob your soil of nitrogen. Wood chips actually increase nitrogen over time as they break down. Your soil pH stays stable too—pine needles won’t acidify your garden, and wood chip mulch won’t either. The good news is that diseased wood rarely transmits pathogens to healthy roots.
When you understand these truths about mulch, you’ll realize it’s one of the safest, most beneficial additions to your landscape. Proper application supports soil health without the drama.