Set your log on a sturdy knee‑high block, square the cut, and spot a natural grain crack. Slip a high‑grade steel wedge in off‑center, tap it lightly with a small mallet, then swing a sledgehammer in steady, controlled blows—pause at the top of each swing to keep the force smooth. Keep the wedge shallow at first, let it bite, and drive it all the way through; if the wood is knotty or stringy, rotate the log and add a second wedge. Once the split is full depth, you can pull the wedges out and finish the chips with an axe. The good news is that mastering this rhythm makes chipping fast and safe, and the next steps will show you how to handle stubborn knots and keep your tools in top shape.
Prep Your Log: Position, Secure, and Spot Natural Cracks
If you set the log up right from the start, everything else falls into place. First, get the log orientation spot on: stand it upright on a knee‑high block on level ground, or prop it securely if you have no block. Center it on the block, keep it far back to protect your toes, and square off any angled cuts with a chainsaw so the surface is flat. Next, do crack identification. Scan the wood for natural checks, rings, or grain splits—those are your primary strike targets. Aim your first blows at the edges where the wood already weakens, then move toward the center once the cracks propagate. Avoid nails, metal, or big knots that could deflect the wedge. This prep gives you a stable, crack‑rich log ready for efficient splitting. Use a proper stance to maximize swing speed and reduce fatigue. Always wear protective gear to prevent injuries while working. A well‑balanced log splitter can reduce effort by up to 50 % compared to manual wedging. Understanding hydraulic pressure helps you match the splitter’s power to the log’s resistance.
Choose the Right Wedge for Log Size and Desired Pieces
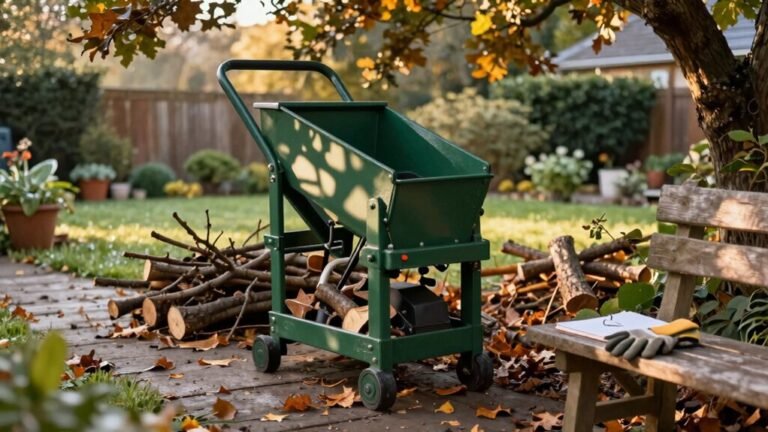
After you’ve got the log positioned and its natural cracks mapped out, the next step is picking the wedge that matches your log’s size and the pieces you want to end up with. For 12‑16‑inch straight‑grain logs, a one‑way wedge made of high‑grade steel works great; its powder‑coat finish resists corrosion and gives solid split efficiency with just two pieces per drive. If you’re tackling 18‑22‑inch oak or locust, a four‑way wedge lets you rotate and drop‑on, delivering four pieces in one go. Smaller 8‑14‑inch logs benefit from a six‑way wedge, which churns out six pieces quickly, boosting split efficiency. Choose the right wedge material and design for your log’s diameter, and you’ll see smoother, faster splits. The relentless wind on Wednesday required loading the trailer in two stages to avoid wind‑related issues. The broader striking surface of a splitting maul can also be advantageous for very dense timber, offering a higher impact force that complements the wedge’s penetration capability. Proper hydraulic valve selection, such as using a directional control valve, ensures consistent pressure delivery for smoother wedge operation.

PROFESSIONAL-GRADE CONSTRUCTION: Experience superior control with our 10-inch high-impact ABS plastic wedges featuring raised grip spikes and reinforced steel insert. Engineered to withstand intense pressure and chainsaw contact during wood cutting operations.

Coloch heavy duty rock splitting wedge measures 0.61 x 4.13 inches (16 x 105mm), fitting perfectly into 5/8 inch diameter holes. The construction of each contains a center wedge, two shims and a rubber ring.

UNCO tree felling wedges package offers a versatile assortment of 4 high-quality wedges (2 small, 2 large) perfect for loggers, arborists, or DIY enthusiasts needing control in wood splitting or felling trees.
Get Safe First: Glasses, Tool Inspection, and Stable Setup for Wedge Splitting
You’ve got the log lined up and the wedge ready, but before you start hammering, the first thing you need to do is lock down safety. Slip on your safety glasses—metal‑on‑metal contact spits tiny shards, and a glasses inspection shows they’re scratch‑free and snug. Next, give the wedge a quick look: no mushroomed edges, no dull spots, and a sharp tip. Check your maul or sledgehammer head for dents; a smooth striking surface keeps fragments from flying. Set up a sturdy chopping block—use a one‑foot‑high stump that’s level and won’t wobble. Position the square side of the log against the block, keep the area clear, and plant your feet shoulder‑width apart. Wear strong work boots for added protection against accidental impacts. With glasses, tool inspection, and block stability nailed down, you’re ready to split safely. Always keep a clear escape route behind you in case a log shifts unexpectedly, and remember that a stable chopping block reduces the risk of sudden movement. Ensure the machine’s safety latch is engaged before each strike to prevent accidental kickback. Higher CFM ratings indicate more airflow power, which translates to faster debris clearing when using a leaf blower.
Insert the First Wedge With a Small Mallet
A good start is to tap the wedge in place with a light‑weight mallet, and you’ll notice the difference right away. Position the wedge slightly off‑center, about an inch from the edge, and line its thin edge with the natural crack. Your grip technique matters—hold the mallet with a firm, balanced wrist and keep the handle close to your palm for control. Lightly strike the wedge, using just enough force to seat it without crushing the wood. Aim for a modest wedge angle; a shallow angle eases the initial bite and prevents the wedge from slipping into the soft pith. Check that the wedge sits stable before moving on, and you’ll have a solid foundation for the next split. Wedge‑and‑hammer technique can reduce overall effort compared to repeated maul strikes. Properly bleed the hydraulic system before use ensures the cylinder operates smoothly and prevents damage. Understanding the different chipper types helps you select the right tool for the job. Some municipalities ban gas‑powered leaf blowers due to air quality concerns, making it essential to verify local regulations before use.
Drive the Wedge to Full‑Depth Split Using Controlled Sledgehammer Blows
The key to getting a clean, full‑depth split is to let the sledgehammer do the work, not your muscles. First, seat the wedge with a light tap, making sure its thin edge follows the grain and the wedge angle matches the log’s width. Then, adopt a controlled backswing: swing steadily, pause at the top, and let the hammer’s weight deliver the blow. Impact timing matters—aim for one solid strike, then a second if the wedge hasn’t fully seated. Keep the blows rhythmic, not frantic; the sledgehammer’s mass drives the wedge deeper without mushrooming the wood. Continue this sequence until the wedge reaches the back of the log, and the split runs end‑to‑end. Using a mall axe to clear residual fibers at the bottom of the split can speed up the process. Before starting, always check hydraulic fluid to ensure the machine operates safely and efficiently. Proper venting prevents air lock and maintains consistent pressure throughout the operation. Proper blade angle maintenance ensures the wedge remains effective and reduces the risk of damage.
Widen the Split With Wooden Wedges for Thick Wood
After the metal wedge has punched a clean, full‑depth crack, it’s time to bring in some wooden wedges to actually widen that opening. Grab a wooden wedge—easy to make from scrap, cost effective, and sturdier than steel for thick wood. Cut a 2‑inch‑by‑9‑inch piece, bevel the top, and seal the ends so it won’t dry and split. Tap it gently into the side of the crack, then swing your maul in a circular motion, working from the outer edge inward. Use at least three wedges; the more you have, the smoother the split widening. Remember, wooden wedges expand faster than metal, so you’ll crack the log in half with fewer blows and protect your chainsaw blades. Wear protective eyewear before starting the widening process. Hydraulic pressure can also be used to assist in the initial cracking of especially hard logs. Powerful airflow helps maintain consistent pressure during the split. Proper battery life ensures the cordless tools stay powered throughout the job.
DIMENSIONS: 9 inches L x 2.25 inches W x 1.75 inches D and weighs 5 lbs

Advanced Wood Splitting Design: Each 4 Lbs wood splitting wedge boasts an innovative 4-direction diamond design, specifically engineered to split logs into four pieces with maximum efficiency and less physical effort.

SOLID MATERIAL - The diamond wood splitting wedge is made of high carbon tool steel. After heat treatment, carbon steel material has the characteristics of high hardness and strength and is very strong, which can bear a large impact load.
Handle Problem Wood: Knots, Burls, and Stringy Species
When you run into a log riddled with knots, burls, or that stringy, rubber‑like grain, the first thing to remember is that you’re not fighting the wood—you’re working with its natural quirks. Start by scanning for the biggest knots and rotate the log so they sit at the bottom; this gives you knot avoidance without forcing the wedge into dense grain. Position the wedge off‑center, aim for a clean crack beside the knot, and tap gently to let the natural fissure guide the split. Species challenges like elm’s stringy texture demand slower, rhythmic tapping, while oak or ash let you be a bit bier. If a burl blocks the path, add a second wedge to “unz” the block, or use a third if the first two bottom out. Keep your eyes on the grain direction, and remember that drier, seasoned wood will split far easier than green, rubber‑like pieces. Maintain a stable stance and bend your knees to ensure controlled, powerful blows. Proper handling of hydraulic fluid can prevent skin irritation and respiratory issues for operators. Using a hydraulic cylinder can significantly reduce the effort required for splitting dense hardwoods. Viscosity stability is essential for consistent performance across temperature variations.

Wg-4x, be ready for winter-the must have tool for splitting firewood

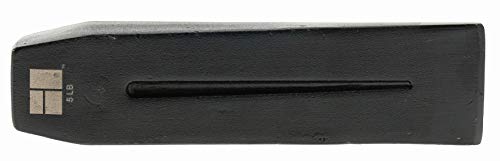
WOOD SPLITTING MADE EASY - The hefty 5 pound build of our splitting wedge makes splitting logs and firewood a breeze. Grab a hand sledge or maul to take on the logs that are difficult to split with an axe alone.

Exceptional Splitting Power: This manual hydraulic log splitter boasts an impressive 12 T of splitting force, effortlessly handling logs up to 18.7 in in length and 8 in in diameter. This powerful performance ensures efficient wood processing for heating or woodworking needs, making it a must-have for any home.
Switch to Axe or Maul When the Log Is Small Enough for Direct Splitting
Once the big rounds are down to a manageable size, you can swap the heavy maul for a lighter splitting axe and let precision take over. At this point the axe vsus debate becomes clear: the axe gives you longer swings without fatigue and lets you aim exactly where the grain wants to split. You’ll notice the maul leverage you relied on earlier isn’t needed for these smaller pieces, so you can keep your arm relaxed and your rhythm steady. If the log is still dense, a quick tap with the maul can loosen a stubborn knot before you finish with the axe. Remember, the goal is to trade raw power for control, keeping each split clean and your workday efficient. Using a 20° wedge on the axe helps guide the split more precisely in dense hardwood.

WOOD SPLITTING MADE EASY - Weighted wedge design makes chopping logs and firewood a breeze with this one handed maul.

MULTI-USE AXE: Sharp blade axe with inseparable riveted head is an ideal wood chopper designed for firewood, yard work, and lawn cleanup, with maximum efficiency for more one-strike splits; Perfect for medium to large size logs

MULTI-USE AXE: Sharp blade wood splitting axe or gardening axe that is an ideal wood chopper designed for firewood, yard work, and lawn cleanup, with maximum efficiency for more one-strike splits; Perfect for medium to large size logs
Roll the Log and Re‑Wedge to Access the Opposite Side
You’ve already got a clean crack in the log, so now it’s time to flip it over and keep the split moving. First, pull out every wedge except the one staying in the middle; tap any stuck pieces at an angle with your sledgehammer so they don’t jam. Position the log upright on a solid base, clear the area, and keep your legs clear of the roll path. Use a cant hook—if you don’t have one, your foot or hands will do—to roll the log 180 degrees, placing the split face down. The good news is this preserves log safety and lets you control technique timing. Apply gentle, controlled blows to the new wedge as you start it, ensuring the crack is visible before increasing force. Once the opposite side is exposed, plant a new wedge in the center, align it with any natural cracks, tap it lightly, then drive it home with the hammer. Alternate wedges as needed, and you’ll see the split widen quickly without excess force.
Maintain Wedges and Sledgehammer for Longevity and Performance
Ever wondered why your wedges and sledgehammer seem to lose their bite after just a few splits? The good news is you can keep them humming with a few easy habits. Start with Wedge sharpening: grind the edges on a four‑inch grinder, chamfer the tip, and knock off any splinters before each session. That sharp tip punches wood cleanly and stops sticking. Next, Sledge upkeep: inspect the striking face for dents, clean off wood chips, and protect the handle with a cover. Store the head dry, and replace it if the balance shifts. Finally, rotate multiple wedges, dress them regularly, and always split on a solid block. Those simple steps will extend the life and performance of both tools. Proper grinding technique removes mushroomed edges and prevents metal fragments from contaminating the wood.

The 16 oz ball peen hammer shapes metal and strikes punches for mechanical work. The 8 oz claw hammer is lightweight and easy to control, perfect for woodworking, furniture assembly, trim work, and small nails


FastEddy Bearings complete bearing kit for Traxxas Traxxas Compatible Sledgehammer Sealed Bearing Kit