Before you pull that starter cord, read your manual and gear up with safety glasses, gloves, and steel-toed boots. Check your spark plug for carbon buildup, then prime the fuel system and set the choke to full. Pull the starter steadily until you feel subtle resistance, then release and let the recoil snap it back. Once it fires, let the engine idle for a couple minutes—this matters especially in cold weather—before you place your first log dead center on the block and get splitting.
Read the Manual and Gear Up: Pre-Operation Essentials
Why do so many people skip the manual? Maybe it seems like overkill, but here’s the thing—that manual review could literally save your fingers. Before you even think about starting your log splitter, crack open that manual and actually read it. Seriously. You’ll learn your specific model’s controls, operator zone, and safety features.
Next up: your PPE checklist. Don’t cheap out here. Grab safety glasses to shield your eyes from flying debris, fitted gloves without loose cuffs, and steel‑toed boots. Secure your hair, ditch the jewelry, and throw on ear protection—hydraulic splitters get loud. Instruct anyone else operating this beast on the same procedures. Your hands and face will thank you later. Understanding hydraulic pressure is crucial for safe operation. Also, keeping a clear working area around the splitter helps prevent accidental contact with moving parts. Regularly inspect the splitter for visible damage before each use.

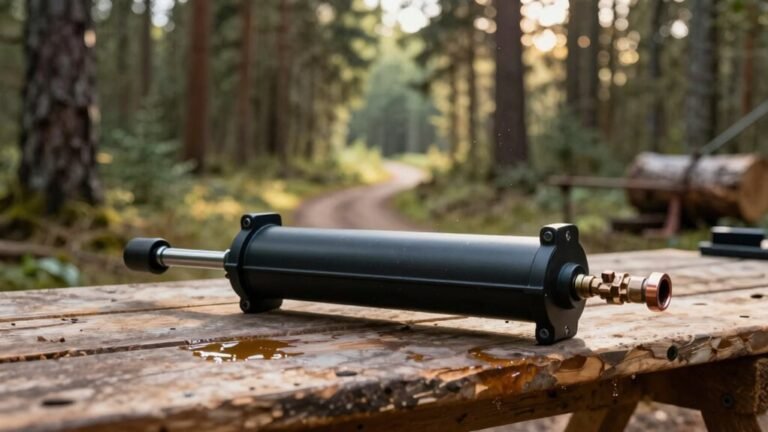
Exceptional Performance at Your Fingertips: With a remarkable maximum speed of 3600 RPM, a maximum operating pressure of 3000 PSI, and an 13 GPM high flow rate, our hydraulic wood log splitter pump is your ultimate solution for tackling all types of wood. This hydraulic gear pump excels in both speed and force, ensuring efficient wood splitting like never before, making it your go-to tool for any wood processing task.

1) Excellent Performance: This hydraulic wood splitting machine pump has a maximum working pressure of 3000 PSI, maximum speed of 3600 RPM, inlet port is 1 inch and outlet port is 1/2 inch NPT, which can efficiently achieve wood cutting and improve work efficiency

[2-STAGE PUMP 11GPM] - RYFT 2-stage HI/LO gear pump.This hydraulic pump has a maximum rotational speed of 3600 RPM, a maximum working pressure of 3000 PSI.The 2-stage pump can provide faster cycle times and higher possible pressure.
Check Your Spark Plug Before Starting
Before you pull that starter cord, you’ve got to check your spark plug—and I mean actually check it, not just assume it’s fine. A fouled or worn plug is the most common reason your log splitter won’t start, so don’t skip this step.
First, let your engine cool completely, then disconnect the wire and unscrew the plug with a 10mm socket. Look for carbon buildup, cracks, or oil residue on the electrode—clean light deposits with a wire brush. Next, do resistance testing with a multimeter on the ohms setting. Resistor plugs should read between 4,000-6,000 ohms; non-resistor plugs near zero. If readings are off or you see damage, replace it with a manufacturer-approved plug and retest before reinstalling. If the spark plug appears intact but you’re still getting no spark, the switch may be faulty and should be tested with a spark tester to rule out ignition system failures before replacing additional components. Properly re‑installing the plug ensures a tight seal and prevents hydraulic fluid leakage into the combustion chamber. Cities that have enacted bans on noisy equipment often cite air quality improvements as a key benefit. Regularly inspecting the air filter can also help maintain optimal airflow and engine performance.
Prime the Fuel and Set Up the Choke
Now that your spark plug’s in good shape, it’s time to dial in your fuel and choke setup—and here’s the thing, getting this right is what separates a smooth start from a frustrating morning of pulling the starter cord over and over.
Start with fuel priming. Before you touch the choke, prime your engine by pulling the starter cord a few times. Some models have a priming bulb; others don’t—check your manual. This gets fuel flowing to the carburetor. Ensure your hydraulic and engine oil are at proper levels before operation to prevent equipment damage.
Next, handle choke adjustment. Move your choke lever to the full choke position for a cold start. Pull the starter slowly until you feel resistance, then stop. Once your engine fires up, gradually move the choke from choke to run position to avoid stalling. For warm restarts, skip full choke entirely and leave it in run. Make sure to clear any debris from the exhaust outlet before starting, as a blocked exhaust can cause a cold start failure.
Pre‑operation checks are essential to verify that all safety features are functional before ignition.Backpack leaf blowers offer higher horsepower, making them ideal for large properties and prolonged use.

Fit for Briggs and Stratton 591016 590614.

Fits Powerhorse 208CC 6HP/6.5HP/7HP # EZ-PH45749-CA 3000 PSI Power Pressure Washer 1577110 1800 2200 3100 4000 Watt Generator.

Pull the Starter Until It Catches
With your fuel primed and choke set, you’re ready for the moment that actually starts your log splitter—pulling that starter cord. Here’s the thing: you’re not yanking with all your might right away. Instead, pull steadily until you feel subtle resistance—that’s compression timing telling you the engine’s ready. You’ll notice the cord tension increase as the piston rises. That resistance signals the exact moment to release and let the recoil snap back. Listen carefully for the engine barely catching during this pull. Avoid forcing beyond that initial catch, which prevents internal damage. Most people don’t realize this gentle approach works better than aggressive pulling. Once you feel that telltale compression, you’ve nailed the timing. Release, let the cord retract, and your splitter fires up efficiently. If your starter cord pulls from an inconvenient angle—sideways or downward—consider rotating the starter assembly 180° to change the pull direction upward, which reduces friction and wear on the cord. This method mirrors the way professional users prioritize ergonomics and efficiency in heavy‑duty equipment. Remember that a properly adjusted choke position is essential for a smooth start.

Compatible with Champion 100424 27‑Ton 224cc log splitter — restores pull‑start functionality and reliable engine ignition for log splitter engines

Pull cord ropeDiameter: 4.0mm; Starter Rope Length: 50 Meters.

For Kohler 6.5hp small engine SH 255 265 270, part# 18 165 05-S replacement for 18-165-05-S, 1816505-S
Let Your Engine Warm Up Before Splitting
Your engine’s just fired up—it’s tempting to grab a log and start splitting right away, especially when you’ve got a pile waiting. Don’t do it. Letting your engine warm up for a couple minutes at fast idle is one of those simple steps that makes a real difference.
Here’s the thing: cold oil doesn’t flow like it should. During warm-up, oil circulation timing guarantees proper lubrication before you load the engine with work. This reduces strain and protects your investment. In winter conditions below 45 degrees, a proper warm-up is absolutely critical. The hydraulics also need time to reach optimal operating temperature, particularly in extreme cold like the –25 °C conditions where machines still perform reliably after a brief warm-up period.
The good news is fuel stabilization and synthetic oils speed things up. Shift to full throttle only after your engine’s genuinely warm. Your splitter—and your engine—will thank you. Also, be sure to check hydraulic level before each use to avoid damage. Hydraulic fluid should be inspected regularly for level and condition to maintain optimal performance. Using the correct viscosity grade ensures the fluid can handle the high pressures typical of wood‑processing hydraulics.
Place Your Logs Right and Keep Your Hands Safe
Before you even think about firing up that splitter, getting your logs positioned correctly is what separates a safe, efficient day from a trip to the ER. Log placement matters more than most people realize. Cut your wood to uniform 12‑inch lengths and square off any angled ends with a chainsaw first. Always set logs on the far side of your block—this protects your feet if you miss. Position each log dead center for balanced, stable contact.
For hand safety, grip the handle with your non‑dominant hand higher up, letting your dominant hand slide down as you work. Keep your feet shoulder‑width apart, knees slightly bent, with your dominant side forward. Here’s the thing: aim your swing so any misses hit the block, never your toes. The chopping block height should be about knee‑high to prevent self‑injury while maintaining proper striking mechanics. Using a hydraulic pressure system ensures consistent force across varied log sizes.
Hydraulic fluid must be regularly checked for leaks to maintain optimal performance.
Engine Won’t Start? Troubleshoot Here
Once you’ve got your logs positioned and your stance locked in, the next hurdle is actually getting that engine to fire up. Start by checking your battery corrosion—corroded terminals are sneaky culprits that’ll block electricity flow and leave you frustrated. Clean any white or blue crusty buildup with a wire brush, then try cranking again.
Next, listen for the fuel pump‘s telltale hum when you turn the key to “On.” If you hear nothing, you’ve likely got fuel pump failure on your hands. Also peek at your fuel level—sounds obvious, but empty tanks happen more often than you’d think. Check your air filter too; a clogged one starves your engine of the oxygen it needs to run. Consider the leaf blower power when selecting a replacement unit for optimal performance. Properly contain and absorb any spilled hydraulic fluid using absorbent pads to prevent environmental contamination. If the engine still won’t start, verify that the ignition switch is functioning correctly.