Choose a chipper that matches your branch size and power source, then lock out the battery or fuel, clear any debris, and tighten the blade and anvil. Slip on a hard hat, safety glasses, ear protection, steel‑toed boots, and snug gloves; tie back hair and ditch loose jewelry. Mark a 15‑meter safety zone, stand to the side of the feed chute, and use a push stick to feed butt‑end‑first pieces, never reaching in while it runs. If a jam occurs, hit the emergency stop, disengage power, and pry the blockage out with a crowbar after loosening the infeed bolt. After each session, brush off chips, clean the hopper, sharpen blades, and store the machine dry with fuel stabilized. The good news is that following these steps keeps you safe and the chipper running smoothly, and the next part shows you how to fine‑tune maintenance for long‑term reliability.
Select the Right Wood Chipper for Your Project
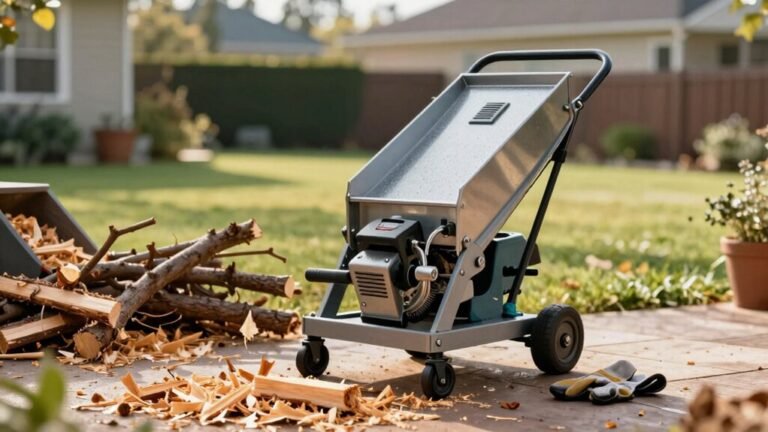
When you’re figuring out which wood chipper fits your project, the first thing to sort out is how big the job actually is. If you only have a small yard with a handful of 2‑inch branches, an electric model will do the trick; its compact model size keeps storage easy and the power source selection stays simple. For larger properties where you’ll be tackling 5‑6‑inch hardwood, a gas‑powered chipper becomes the logical choice—its higher horsepower handles denser material and gives you unlimited mobility. Hobby farms that need occasional pruning can stick with a mid‑size residential unit, while commercial crews often opt for a PTO‑driven chipper attached to a tractor. The good news is you can match model size and power source selection directly to your debris volume, material type, and how often you’ll be chipping. This way you avoid overspending on a heavy‑duty machine you’ll barely use. Understanding the branch volume you’ll process helps you choose a chipper with the appropriate capacity. Modern leaf blowers demonstrate how efficient yard cleanup can be achieved with powerful, user‑friendly tools. A well‑designed chipper can also improve soil health by returning organic matter to the ground.

POWERFUL PERFORMANCE: 15-AMP motor shreds branches up to 1.8-inches in thickness into garden mulch

Powerful Performance: Wood chippers, shredders, & mulchers are essential for maintaining a neat and tidy yard, and the Westinghouse 1.7in Shredder Chipper delivers high-performance with its 15A motor running at up to 4000 RPM, effortlessly shredding wood up to 1.8" thick

POWERFUL PERFORMANCE: 15-AMP high performance motor shreds branches up to 1.8-inches in thickness into garden mulch, perfect for small and flexible branches
Gear up With Wood Chipper Safety Gear
Before you even think about feeding a branch into the chipper, you’ve got to gear up—because a hard hat, safety glasses, ear protection, steel‑toed boots, and sturdy gloves aren’t just nice‑to‑have, they’re the minimum gear that keeps you from turning a simple yard job into a trip to the ER. Start with a quick PPE checklist: hard hat with visor and chin strap, ANSI‑approved goggles, earplugs or muffs, slip‑resistant steel‑toed boots, and close‑fitting rugged gloves. Do a brief fit testing on each item; the hat should sit level, glasses must stay snug, and ear protection should seal without discomfort. Slip on long pants, tie back hair, and ditch jewelry. Once you’re fully dressed, you’re ready to chip safely. Understanding hydraulic pressure limits helps ensure your safety gear is adequate for the forces involved. Remember that many hydraulic fluids used in chippers are highly flammable and should be stored away from sparks and open flames. Proper ventilation prevents inhalation of toxic fumes during operation.

Cut-Resistant Gloves for Hand Protection: Designed to safeguard your hands during various tasks, BeaverCraft safety gloves allow you to work without the fear of cuts or injuries.

Cut-Resistant Gloves for Hand Protection: Designed to safeguard your hands during various tasks, BeaverCraft safety gloves allow you to work without the fear of cuts or injuries.

ANTI-VIBRATION CHAINSAW GLOVES – Designed to reduce hand fatigue during chainsaw use, these hi-vis safety gloves feature gel and foam padding in the palms to dampen vibration for greater comfort and control when tree cutting and logging.
Inspect and Prepare the Wood Chipper
Even if you’ve already suited up, you still need to give the chipper a quick once‑over before you start feeding branches. First, disengage the battery disconnect switch and slap a lockout tag on it—this stops any accidental startup. Verify the power source is isolated and there are no electrical hazards. Next, check the engine area for debris, fuel spills, or hydraulic leaks; clear anything with a brush or compressed air. Now focus on blade safety: tighten all fasteners, inspect the anvil for damage, and make sure the grinder grates aren’t cracked. Test blade sharpness by feeling the edge—if it’s dull, sharpen or replace it. Finally, confirm oil, hydraulic fluid, and coolant levels, and grease every lubrication point before you fire her up. Check hydraulic fluid using the dipstick and ensure it’s within the recommended range. Choose a log splitter that matches the size and type of wood you’ll be processing for optimal efficiency. Regularly inspect the hydraulic fluid for discoloration to catch early signs of degradation.
Set Up a Hazard‑Free Work Area
Choosing the right spot for your wood chipper is more than just finding a flat patch of grass—it’s about creating a safe, well‑lit work zone that keeps you, anyone nearby, and the machine itself out of trouble. First, do a quick hazard assessment: look for rocks, sticks, metal pieces, or any debris that could jam the feed. Perform a thorough site clearance, raking away twigs and leaves and removing any foreign objects. Mark a 15‑meter exclusion zone with cones or tape, and keep children and pets well away—signs and barriers help. Position the discharge chute so chips fly away from the work crew, and assign a banksman to watch the perimeter. Wear slip‑resistant shoes and stand to the side of the infeed chute for optimal safety. Before operating, verify that the hydraulic system is free of air by checking cylinder bleed to prevent loss of power and premature wear. Operators should also be able to detect the characteristic sweet petroleum odor of hydraulic fluid, which can indicate a leak or contamination when it deviates from the normal faint metallic undertone.
![[5 Pack] 18 inch Traffic Cones, Safety Road Parking Cones,Agility Field Marker Cones for Soccer Basketball Football Drills Training, Outdoor Sport Activity & Festive Events](https://m.media-amazon.com/images/I/31YdwaIYKuL._SL500_.jpg)
PREMIUM PLASTIC - Heavy-duty polyethylene material for long-lasting use and resistance to fading. Thicker material outlasts other cheap quality traffic cones.

Superior Visibility: Our traffic delineator posts come with highly reflective collars and a bright color scheme. This ensures maximum visibility in all weather conditions, effectively attracting attention and warning others, whether it's a sunny day or a rainy one.

Heavy Duty Base - Heavy duty base cones have stable structure, wind-proof design, better safety and convenient operation. And our weighted cones stay up right without falling in wind
Start and Warm Up the Engine
Ever wondered why a wood chipper’s engine feels sluggish if you just crank it up cold? That’s because the engine needs a proper warm‑up before it can handle the load. First, check fuel and oil levels, then disconnect the spark plug wire to keep it from firing unintentionally. Set the choke to CHOKE, throttle to FAST, and turn the ignition on. Pull the recoil starter slowly until you feel resistance, then yank it quickly. You’ll hear a deeper engine noise and maybe a faint fuel odor as it fires up. Let it idle at half throttle for three to four minutes, gradually moving the choke to RUN. Once the engine reaches full speed, you’re ready to feed material. Check the safety decals to ensure they are visible and intact before starting. Regularly inspect the hydraulic fluid level and condition to prevent overheating and maintain optimal performance. Inspect the reservoir for any leak signs before each use. Using the correct ISO VG 32‑46 fluid helps ensure smooth operation under typical residential use.

SAE 10W-30 MOTOR OIL FOR SMALL ENGINES: One 32 fl oz bottle of STP Premium Synthetic Blend 4 Cycle Small Engine Oil SAE 10W-30, formulated for small engines in lawnmowers, generators, tractors, snow blowers, and other outdoor power equipment

2.6-Ounce - 1 Gallon Mix

100% Synthetic SAE 5W-30
Feed Material Correctly
When you’re ready to feed material into a wood chipper, the first thing to remember is that the way you position yourself and the material can make the whole operation safer and smoother. Stand to the side of the chute, never directly in front, and keep your feet clear of debris. Wear safety glasses, sturdy boots, and avoid loose jewelry. Check each branch for metal or stones, trim oversized pieces, and feed butt‑end first, one at a time. Use a wooden push stick or a long branch to guide material into the rollers, then step back. Keep a safety watch nearby, maintain zone safety, and never reach into the chute while the chipper runs. This approach prevents pull‑in hazards and keeps the feed path clean. Use the Branch Manager grapple to place brush butt on the feed table end for precise control. Understanding the different chipper types helps you match the tool to the job. Proper hydraulic cylinder seals, such as polyurethane rod seals, are essential for preventing leaks and ensuring smooth operation under high‑pressure, abrasive conditions.
Clear Jams and Shut Down Safely
You’ve just cleared the branch and stepped back, but now the chipper’s jammed—don’t panic. First, hit the emergency stop or kill switch; that cuts power instantly and prevents the drum from turning while you work. Next, disconnect the power source and remove the spark plug wire or key, then let the machine cool completely. Put on gloves and eyewear, then stabilize the unit on jack stands. Loosen the hydraulic infeed bolt with a 5/8‑open‑end wrench, leaving three threads engaged, and slip a crowbar under the infeed. Use your body weight to lift and wiggle the jammed piece free. After the jam removal, verify all moving parts have stopped before re‑engaging power for a quick test run. The machine logs show that you have logged 25 hours on the Woodland Mills WC‑46, indicating extensive use. The hydraulic ram’s pressure surge can be harnessed to provide auxiliary power for small tools like a wood chipper in off‑grid settings. Always wear a pressure relief valve before attempting any maintenance to ensure the system is fully depressurized. Bleeding a hydraulic cylinder without a dedicated bleeder valve can be done by attaching a clear hose to a high point, opening the system, and cycling the cylinder to purge trapped air.
Clean, Maintain, and Store the Chipper
If you want your wood chipper to stay reliable season after season, a solid cleaning, maintenance, and storage routine is non‑negotiable. After each run, brush off chips and sap, wipe the control panel with a damp cloth, and rinse the engine fins and muffler. Then do a quick oil cleaning of the reservoir and around the gas cap to keep everything accessible. Once a month, power‑wash the hopper, chute, and undercarriage, dry it fully, and sharpen any dull blades with an oil stone. Before seasonal storage, drain fuel or add stabilizer, change the oil, replace the air filter, and disconnect the spark plug. Store the chipper in a dry, sheltered garage under a breathable cover, away from moisture, heat, and children. This routine keeps rust at bay and guarantees your machine is ready when you need it. Monitoring hydraulic fluid temperature helps prevent overheating and ensures optimal performance.

Durable Material: The Wood Chipper Shredder Mulcher Leaf Vacuum Kit is made from high-quality PU, ensuring long-lasting use without deformation. Ideal for various garden cleaning tasks, including clearing debris around yards, gardens, and orchards.

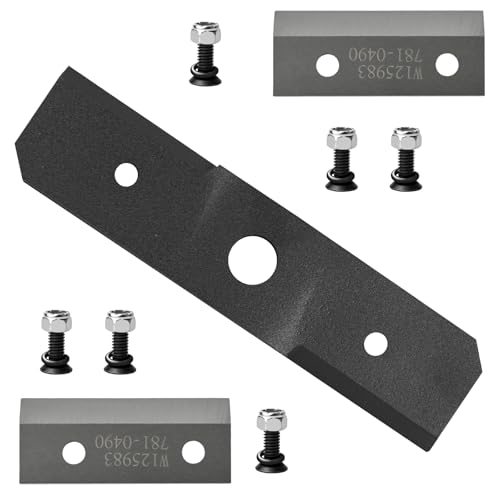
781-0490 742-0571 Chipper Shredder Blade Replace Part Numbers: 981-0490, 781-0490, 942-0571, 742-0571,942-0544, 742-0544, 942-0544A, 742-0544A, 942-0544B, 742-0544B