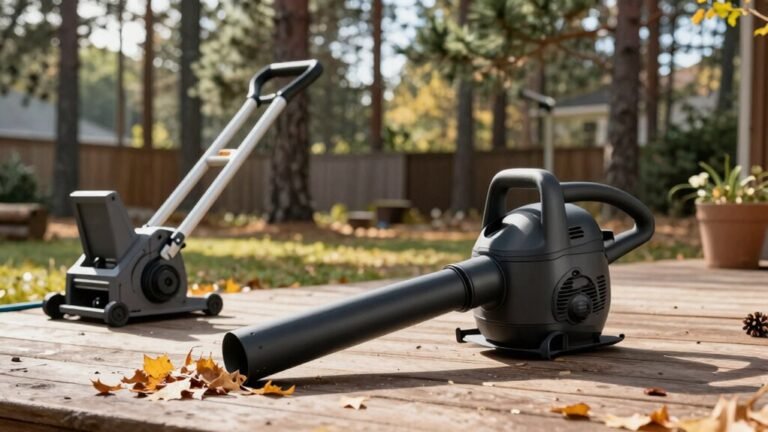
Starting your Red Max leaf blower comes down to three things: getting the fuel mix right (50:1 gas-to-oil ratio), priming the carburetor with six bulb presses, and setting the choke to cold start. Secure the blower, pull the recoil cord with a smooth, confident stroke, then flip the choke to run mode once it fires. Let it warm up briefly before cranking the throttle to full power. If it won’t turn over, check your spark plug and air filter first—nine times out of ten, that’s your culprit.
Check Your Fuel Mix, Air Filter, and Safety Gear
Before you even think about pulling that starter cord on your RedMax leaf blower, you’ve got to nail three foundational things: your fuel mix, your air filter, and your safety gear.
First, your fuel mix. You need minimum 89 octane gasoline—mid-grade or premium—mixed at a 50:1 ratio with RedMax Air-Cooled Max Life synthetic blend oil. Don’t skimp here; low octane causes detonation and piston seizures. Measure precisely, add partial gas first, pour in all oil, then shake hard for 10-15 seconds before topping off with remaining gas. Always use unleaded gasoline only, as leaded fuel will damage your catalytic converter.
Backpack leaf blowers typically require more power, making the correct fuel ratio even more critical for sustained performance.
Next, inspect that air filter. A clogged filter starves your engine and causes overheating. Clean or replace it if needed.
Finally, strap on eye protection, hearing protection, and gloves. Wear sturdy boots for stability. Never refuel while the engine’s running or hot—wait at least 10 feet from the fueling area before starting.
Consider the environmental impact of your choice when deciding between gas and electric models.

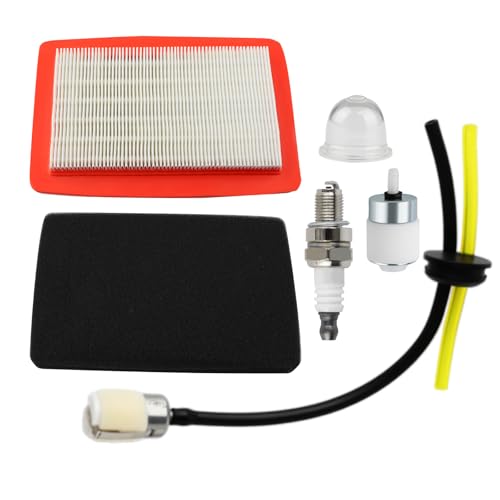
Air filter fuel line for Redmax EBZ7001 EBZ7001RH EBZ7100 EBZ7100RH EBZ7150 EBZ7150RH EBZ7500 EBZ7500RH backpack blower; repair parts for Redmax backpack blower tune up kit

【OEM Part Number】EBZ7500 Fuel Tank Assembly Replace OEM for 545 18 08 579140201, 579140205.
Prime Your Red Max Leaf Blower’s Fuel System Correctly
Once you’ve got your fuel mix ready and your safety gear on, it’s time to prime that carburetor—and here’s the thing, this step is what separates a smooth start from yanking that cord twenty times in frustration. Locate the rubber primer bulb on your carburetor’s bottom, then depress it six full times for standard models. You’ll notice the bulb gradually fills with fuel—that’s exactly what you want. This process purges air from the carburetor lines and delivers gasoline for a rich start mixture. If the bulb feels hard to press or stays depressed, you’ve got a carburetor issue. No fuel flowing? Check your fuel filter first. Expect occasional temperamental behavior from two-cycle engines, so occasional starting difficulty is normal even with proper priming. carburetor cleaning should be performed periodically to prevent buildup that can cause these issues. Once you’ve primed successfully, you’re ready to engage the choke and pull that starter cord. Proper fuel‑oil ratio ensures optimal engine performance and longevity. Stihl’s durability often exceeds that of comparable models, making it a reliable choice for frequent use.

Brand New replacement chainsaw fuel filter fit for Stihl, for Poulan, for Husqvarna 2 Cycle engines;

Package includes 6 pieces 0.2" in-line fuel filters; fit for 0.2" (5mm inner diameter) fuel hoses.

✔️Suitable for Most 2-cycle Small Engines
Set the Choke and Throttle to Starting Position
Now that you’ve primed your fuel system and you’re holding that primed blower, you’ll want to dial in your choke and throttle before you touch that starter cord. Your choke adjustment is essential here—move that choke lever downward to the closed position. This restricts airflow and enriches your fuel-air mixture, which is exactly what a cold engine needs to fire up. Next, handle your throttle positioning by setting the throttle to its starting position. You’ll typically find these controls right near your throttle handle on the blower’s body. Don’t skip this step—proper throttle positioning prevents flooding and gives your engine the best chance at a clean start. Ensure the start button is in choke position before pulling the recoil cord to begin the starting sequence. You’re almost ready to pull that cord. Remember to verify the fuel‑oil ratio is correct before starting to avoid engine damage. Also, be aware that a cold engine may require a few extra pulls of the starter cord to ignite successfully. Check the spark plug for wear or fouling before you start.

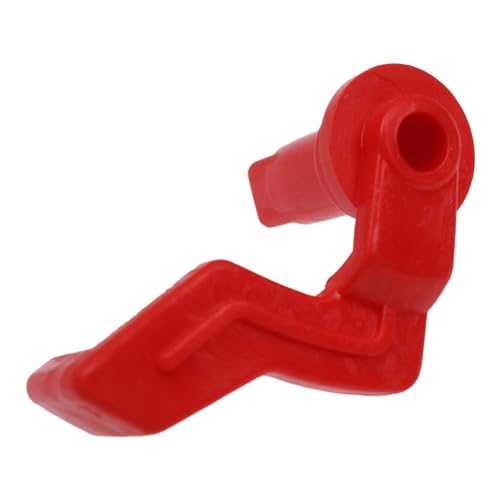
Replacement parts,non original

Pull the Recoil Starter to Fire the Engine
How’s your grip? Make sure you’ve got the blower secured firmly on a stable surface before you start. Position your handle solidly in your hand, then check that the rope’s fully retracted into the starter housing.
Now pull that handle briskly and steadily—think smooth motion, not a violent yank. You’re engaging the spring coil mechanism inside, which’ll spin the flywheel and fire up your engine. A single, confident pull should do it if everything’s set right. For consistent results, apply tension by counting spins to ensure your recoil system is properly wound and ready to engage.
Here’s the thing: if the engine doesn’t catch, release the handle slowly and let it retract naturally. Avoid jerking it back or you’ll risk wearing down those plastic teeth on the starter. Try up to three pulls before troubleshooting further. Too much aggression causes wear that’ll cost you down the road. Always verify the fuel mixture is correct before pulling, as a proper fuel‑oil ratio is essential for reliable ignition.
pre‑flight checks should be performed before any start‑up attempt.
Perform a quick visual inspection of the air filter to ensure it’s clean and unobstructed.


Replaces (OEM):Fit Echo: 6820675010, A051001520.Fit Husqvarna: 502843101.Fit Red Max: 148775100, 148775101, 502843101, T403075100. Fit Shindaiwa: 68206-75010, A051001520

750 lbs High tensile Strength Pull Cord – The outer layer of this pull rope is engineered with 16 strands of high-strength polyester braid, boasting a breaking strength of up to 750 lbs. The 4mm thickness provides superior tensile strength and impact cushioning, making this pull start cord the most reliable choice for heavy-duty engines like Briggs & Stratton, Honda GX390, and Predator 212.
Warm Up Your Blower and Switch to Run Mode
Before you can really put your Red Max blower to work, you’ve got to get the engine warmed up and ready for actual operation—and this is where a lot of folks trip up because they skip steps or rush through the process. After that initial fire, let it run for just a second before flipping the choke to run mode. If it’s warm outside, kill the choke immediately. Cold weather? Keep it engaged briefly until the engine catches its rhythm. Once you hear that characteristic burp, push the choke function in and switch your kill switch to the on position. Monitor your engine response to choke adjustments to ensure smooth operation. Check your fuel filter and ignition timing are solid. Adjust throttle as needed, and you’re golden—your blower’s ready to rip. Remember to choose the right nozzle for optimal airflow and noise reduction. Ensure the spark plug is clean and properly gapped before starting.
Adjust Throttle for Full Power Operation
With your Red Max warmed up and running smoothly, you’re ready to release its full potential—and that’s where throttle adjustment comes in. Throttle calibration is essential for power tuning your blower to peak performance.
Hold the throttle at full power and locate the high-speed screw nearest your air filter. Turn it slowly inward until your RPMs peak, then back off slightly to find that sweet spot. You’ll want to make small adjustments—about an eighth‑inch turns maximum—and listen carefully for how the engine responds.
What most people don’t realize is that you’re not chasing the absolute highest RPM. Instead, you’re dialing in smooth, consistent full‑throttle operation. If your engine cuts out during operation, enriching the fuel mixture by turning the adjustment screw counter‑clockwise can restore stable fuel delivery and prevent power loss. Once you’ve nailed the adjustment, test your blower at full power to confirm that satisfying hum that tells you you’re running right. Electric blowers are known for lower noise because they lack a noisy internal combustion engine.
Higher CFM ratings indicate greater airflow power, which helps clear debris more efficiently. The hydraulic ram’s pressure surge can be harnessed to drive mechanical loads without external electricity.
Engine Won’t Start? Diagnose the Problem Here?
When your Red Max refuses to fire up, the frustration’s real—but here’s the thing: most starting problems come down to a handful of culprits you can diagnose yourself without special tools or a trip to the shop. Start with air filter troubleshooting; a clogged filter starves your engine of oxygen. Next, inspect your spark plug for dirt or wear, then perform ignition coil checks by removing the boot and testing for spark. Check fuel delivery by adding gas directly to the carburetor. A loose intake mount can prevent proper air-fuel mixture delivery and cause the engine to cut out shortly after starting. Don’t overlook compression either—a weak rope pull signals deeper issues. Work through these systematically, and you’ll likely pinpoint the problem before considering professional help. The fan’s centrifugal acceleration creates the high‑velocity airflow that is essential for moving debris efficiently. Remember to verify the fuel‑oil ratio is correct before refilling to avoid engine damage. Understanding the power‑to‑weight ratio of the blower can help you choose the right model for your terrain and workload.

Ignition Coil Replacement for Redmax Backpack Blower Models: EBZ6500, EBZ7500, EBZ8500, EBZ8550, EBZ6500RH, EBZ7500RH, EBZ8500RH, EBZ8550RH


Replace RedMax EBZ8500 EBZ7500 EBZ7100 EBZ7150RH EBZ7500 EBZ7500RH EBZ8001 EBZ8001RH EBZ8500RH EBZ7100RH EBZ7500RH EBZ8050 EBZ8500RH EBZ7150 EBZ7500 EBZ7500RH EBZ8001RH EBZ8050RH Backpack Blowers,EB7000 series and EB8000 series blowers.
Turn Off Your Blower and Secure It
After you’ve finished blowing leaves and you’re ready to pack it in, shutting down your Red Max properly—and securing it safely—matters more than most folks realize. First, move your throttle to the cold start position and hold the trigger down until the engine completely stops. Here’s the thing: if your kill switch isn’t responding, this throttle method works as a solid backup. Before storing, verify your safety gear‘s in good shape—check those gloves and glasses for damage. Don’t skip switch maintenance either; a faulty kill switch on models like the EBZ7500 can become a real headache later. If your blower won’t shut off despite using the throttle, check the ground connection at the switch as a loose wire may be preventing proper shutdown. Once everything’s off, let it cool slightly, then store it in a dry spot away from fuel sources. Additionally, always inspect the spark plug before each use to ensure reliable ignition and prevent engine strain.