First, locate the stamped part number or tell if it’s a tie‑rod (threaded rod, end caps) or welded cylinder, then grab a tape measure, calipers, and a bore gauge. Measure the barrel’s outer circumference, divide by π and subtract wall thickness to get bore diameter, and verify with the gauge. Use a micrometer or caliper to size the rod at three spots, average, and check against the spec sheet. Extend the cylinder, measure base‑to‑tip for full length, then retract and note the pin‑to‑pin distance; the difference is your stroke. Finally, size the pin hole and port threads with a thread gauge, compare everything to the manufacturer’s data, and you’ll have a spot‑on fit—keep going and you’ll uncover the rest of the details you need.
Identify Cylinder Type Before Cylinder Measurement
So, how do you know what kind of cylinder you’ve got before you even start measuring? First, look for the stamped or plated part number on the barrel—usually five to ten digits. That part number identification is your fastest shortcut; plug it into a database and you’ll instantly see the model, manufacturer, and specs. If the stamp’s missing, check the body style. Body style recognition lets you tell a tie‑rod cylinder from a welded one, or spot a telescopic design. Tie‑rod units have threaded rods and end caps, while welded cylinders show a seamless barrel‑to‑cap weld. Spotting the right style narrows down the possible part numbers, saving you time before you pull out the calipers. Understanding hydraulic pressure is essential for selecting the correct cylinder size for wood processing tasks. Proper bleeding of the hydraulic system prevents air lock and ensures consistent force delivery. Selecting the appropriate hydraulic fluid based on viscosity and temperature stability can significantly improve cylinder performance and longevity.
What Tools Do You Need to Measure a Cylinder Accurately?
After you’ve figured out which cylinder you’re dealing with, the next step is gathering the right tools to get spot measurements. Grab a sturdy tape measure for retracted and extended lengths; it gives you quick stroke data and helps you check mounting gaps. A set of calipers is your workhorse for rod diameter, port opening, and pin sizes—just make sure you take several readings to account for wear. For critical dimensions, pull out a micrometer; its precision prevents costly seal‑kit mistakes. Keep the manufacturer’s manual handy for reference specs and safety guidelines. Finally, a bore gauge and a ruler round out the kit, letting you verify internal barrel size and port distances without breaking a sweat. Remember, s tension on the rod can skew readings, so follow the safety guidelines and keep everything stable. Use a standard pin‑center reference to ensure consistent measurements across retracted and extended positions. Before you start, always check hydraulic fluid to confirm the system is properly lubricated and safe to work on. Also, be sure to inspect the dipstick for cleanliness before measuring fluid level. Regularly monitor the fluid for discoloration to catch early signs of degradation.

【Universal Compatibility】 Hydraulic Seal Installer and pick and hook set are quick and safe installation tools for flexible rod seals. 3 sizes to cover most rod seal installation job from 0.87" up (Rod Diameters): (S) 22-40mm (0.87"-1.57" Rod) gland hole ; (M) 40-70mm (1.57-2.75" Rod) gland hole; (L) 70-165mm (2.75"-6.49" Rod) gland hole.

Application : Hydraulic Cylinder Repair Tool kit For Hydraulic Cylinder skid steers, loaders, backhoes.Made of high-quality steel and rubber materials, our professional technology makes the products more high-quality, durable and rust-free, which provides great convenience for maintenance workers.

Strut Information: Gas strut extended length 10.00“, compressed length 6.46", stroke length 3.54", support 50 lbs/ 254n for 40-55 lbs heavy lid. Replacement OEM number: 4059, C16-10445,10159-68
Measure Bore Diameter Using Circumference and Direct Bore Gauging
If you can’t get inside the barrel of a wood‑chipper or log‑splitter cylinder, the circumference trick is your best friend. Wrap a tape measure around the outside, note the total, then divide by π (≈3.14) to get the outer diameter. Subtract the wall thickness—usually 3/16‑¼ in per side—to reveal the bore. Knowing the pipe material helps you estimate that thickness, because steel and alloy walls differ. For tighter tolerances, pull out a dial bore gauge. Drive its wheels along the barrel while watching the dial; any wobble flags seal wear or out‑of‑round spots. Compare the resulting bore to standard sizes; if it matches, you’ve got a solid baseline for force calculations. Use a micrometer to double‑check the bore diameter when possible. Always follow safety procedures when handling hydraulic components to prevent injury. Selecting the proper hydraulic fluid also depends on the temperature viscosity range of the equipment. Hydraulic fluid viscosity must remain stable across operating temperatures to ensure consistent performance.

2"-6" Wide Measuring Range: Covers small engine cylinders to large diesel bores (50mm-150mm), ideal for automotive repair, engine rebuilding, and industrial machining

ACCURATE MEASUREMENTS: This Bore Gage Features A Dial Indicator With A Graduations Of 0.0005" And A Measuring Depth Of 9.5"

【ACCURATE INTERNAL DIAMETER MEASUREMENT】 Measure internal diameters from 50mm to 160mm / 2" to 6" with 0.01mm / 0.0005" resolution. Ideal for checking engine cylinders, hydraulic bores, sleeves, bearing housings, and machined parts.
Determine Rod Diameter With a Micrometer or Caliper
Ever wondered how to nail the exact rod size on your wood‑chipper or log‑splitter without guessing? Grab a precision micrometer or a digital caliper—these tools beat tape measures any day. First, set the jaws perpendicular to the rod axis and slide them gently onto the midpoint, away from threads or any damage. If your rod has chrome plating, be extra gentle; you don’t want to dent that finish. Record the measurement in inches, then repeat at two more spots and average the results. Cross‑check with the other tool to catch any calibration errors, and verify the number against the nameplate. Accurate rod diameter prevents bending, ensures proper seal kits, and keeps your equipment running smoothly. Proper cleaning before measurement helps avoid debris that could skew the reading. The hydraulic ram’s pressure surge can be harnessed to power a wood chipper when water flow is available. Follow the recommended seal replacement steps to maintain cylinder integrity.

【PROFESSIONAL STAINLESS STEEL】 Forged from heavy-duty polished stainless steel, this 6 inch digital caliper delivers a solid, stable feel in hand. Completely eliminates the flimsy warping and precision loss of cheap plastic caliper tools for long-term reliability.

1.Precise Measurement: The GODESON disc micrometer has a measuring range of 0-6inch/0-150mm and an accuracy of ±0.005 "/0.05mm. You can accurately measure the thickness of the brake disc to ensure that your brake system is in top condition.

Fitment —Hydraulic Brake Master Cylinder Caliper System fit for 97cc 2.8HP Baja Doodle Bug Dirt Bug DB30 Mini Bike Mini Moto,Baja Blitz Mini Bike,Predator 212cc Baja Doodlebug mini bike.
Calculate Stroke Length for Cylinder Measurement
When you’re figuring out how far your cylinder’s rod actually travels, the key is to measure the stroke length— the distance from the fully retracted position to the fully extended one. First, fully extend the cylinder, then use a tape rule or caliper along the centerline to measure from the cylinder base to the rod tip, ignoring the piston. Next, measure the retracted pin‑to‑pin distance and subtract it from the extended length; that’s your stroke calculation. Do it three times for consistency and note any clevis offsets. With the stroke length in hand, you can plug it into the volume estimation formula π × bore² × stroke ÷ 4 to gauge how much fluid your system needs for each cycle. Understanding pressure dynamics is essential for matching cylinder size to the required cutting force. Proper selection of hydraulic fluid can also prevent metal corrosion in the system. Monitoring fluid temperature helps avoid overheating and maintain optimal performance.
Check Pin Hole Size, Mount Compatibility, and Fit
Even before you start swapping out the cylinder, you’ve got to make sure the pin holes, mount type, and overall fit line up with your wood‑chipper or log‑splitter. Grab a micrometer or digital calipers and measure the inside diameter of each pin hole; common sizes run from 1‑inch to 1.625‑inches. Note the pin length too—many cylinders use a 4.6‑inch pin with a 1‑inch diameter. Next, check mount compatibility: identify whether you have a clevis, cross‑tube, or swivel‑eye mount and verify the mounting hole diameter matches the pin you measured. Finally, run a quick fit verification by aligning the base and rod ends, confirming center‑to‑center distances, and making sure hoses, ports, and adapters all line up without forcing anything. This ensures a seamless, trouble‑free installation. Selecting the proper hydraulic pump type is critical for achieving the required flow rate and pressure in heavy‑duty timber processing applications. Be aware that hydraulic fluid flammability can pose a fire risk if leaks occur near hot surfaces. Always follow the pressure relief procedure outlined in the safety guidelines before beginning any removal or installation work.

Bore:1.5" (OD 1.88")., Stroke:12", Rod:1", Retracted:20", Extended:32", Pin holes:0.75"

【Precision Application】This 25mm/0.98in hydraulic cylinder is exclusively designed for mini excavator hydraulic thumb clamp attachments and ONLY for single hole excavator thumb. Verify compatibility prior to purchase!
Validate Your Measurements With Manufacturer Specs
If you’ve already taken the time to measure the bore, rod, stroke, and pin‑to‑pin distances on your wood‑chipper or log‑splitter cylinder, the next step is to line those numbers up with the manufacturer’s specs. Grab the manufacturer documentation—drawings, manuals, or online configuration tools—and compare each measurement. Bore diameter must match the tolerance listed; rod size and stroke length should sit exactly where the spec sheet says they do. Pin‑to‑pin length, port diameters, and thread pitches all need verification against the original data. Use the supplied worksheet to record units correctly, then double‑check every entry. This measurement verification step catches mismatches before you order a replacement, saving time and costly errors. Selecting the proper hydraulic fluid viscosity ensures the cylinder operates within its designed performance envelope. Polyurethane seals provide superior wear resistance in abrasive environments.
Avoid Common Measuring Mistakes Specific to Splitter/Chipper Cylinders
You might think a quick glance with a tape measure is enough, but the reality is that even a half‑inch error can keep a splitter or chipper from ever working safely. The good news is you can dodge that by using calipers for bore and rod diameters, not a tape. Measure the bore at several points, average them, and subtract the wall thickness (3/16‑1/4 in) to get the true inner diameter. Don’t rely on nominal port sizes; verify threads with a gauge. Always measure the rod at its centre, not the worn ends, and do it with the piston fully extended and the cylinder unloaded. This prevents mis‑alignment, meets torque requirements, and protects fl safety.
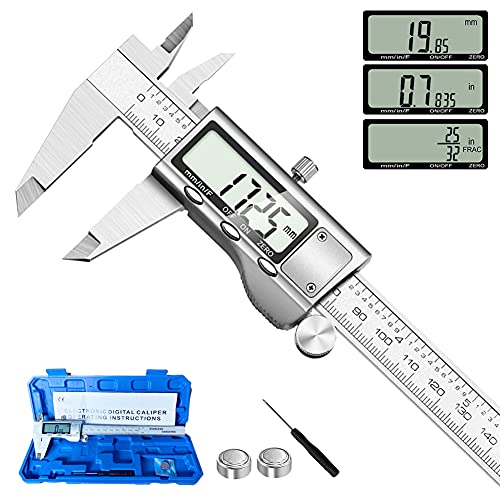
【STAINLESS STEEL MATERIAL】The vernier caliper is made of high-strength stainless steel and is waterproof and dirt-proof. The service life of this stainless steel digital caliper is longer than that of calipers with plastic or carbon fiber parts.

[INCH/MM Conversion]: One button can quickly convert two measuring unit (INCH/MM). Measuring Range:0 - 150mm (6") / Resolution: 0.01mm (0.0005")/Accuracy: ±0.02mm (0.001")

Micrometer Caliper digital dual scale caliper calibre : The upper scale is inches and the lower scale is centimeters